I’m working on two quilts that are made up of tiny
blocks. The first, Dear Jane, has been a
two-year journey, and the second, The Farmer’s Wife, is a fairly recent
undertaking.
Wonderful quilts.
Tiny, tiny blocks.
The Farmer’s Wife blocks are 6 ½-inches unfinished and
Dear Jane’s blocks are 4 ½-inches unfinished.
I’ve learned a great deal from both, but the primary lesson that I’ve
come away with is this: Paper piecing is a great tool to have in your quilting
tool box. The smaller the block, the better it is to paper piece it – or at
least so in my opinion. Same thing if
there are a lot of pieces in the block – it’s just easier to paper piece
it. Some quilt patterns have paper
piecing instructions, some are partially paper pieced and the remainder of the
pattern is traditionally pieced. Some
quilts, such as Dear Jane and the Farmer’s Wife, give you a choice.
Paper piecing (also called foundation piecing) is
defined as a technique that involves
sewing pieces of fabric to a paper foundation following a numerical
sequence. Seam lines are traced on the
foundation. The pieces of fabric are
sewn onto the back side of this foundation (the unmarked side, which is
actually the right side of the block). This sewing technique on a foundation
allows one to work with very small and uneven pieces with great accuracy, as
all sewing takes place along straight lines. (Angie’s Bits and Pieces)
Because of the accuracy, this is my go-to technique for
sharp points (e.g., flying geese, New York Beauty blocks).

New York Beauty Block

Flying Geese Block
Paper piecing is also a great piecing method
to use if you have a block that has lots of bias edges, such as those with
several half-square triangles. And if
you have blocks like you do in the Dear Jane Quilt – small, complicated blocks
with lots and lots of tiny pieces and seams – paper piecing is a terrific way
to feed all those small pieces through your sewing machine and over the feed
dogs because there is that smooth layer of foundation that won’t get caught in
the feed dogs like the miniature pieces of material and seams will.
However, to be completely honest, I was never a huge fan
of this technique until I attempted a Judy Niemeyer pattern several years
ago. Judy’s patterns are gorgeous and
making one of her quilts was definitely on my Quilting Bucket List. But if this was to be done, I knew that
somewhere along the way, I would have to discover my paper-piecing Zen. And I did.
Somewhere between the 800 flying geese and the New York Beauty squares,
me and paper piecing made our peace. So
now if I have lots of pieces, lots of biased edges, or need really sharp points,
I pull out the paper piecing technique and have at.

Judy Niemeyer's Glacier Star
The first decision in this technique is what am I going to use as the foundation? In other words, what medium is actually
going to have the pattern printed on it for you to follow? I’ve tried lots of different things, but I
keep coming back to two. The first is
standard 8 ½ x 11-inch newsprint. It
easily tears away once you’ve completed your block, and it’s thin enough to see
through. Remember, it’s the side of the paper that
the pattern is not printed on that’s the right side of the block, but
the cutting and sewing lines are on the wrong side. You still have to see these lines to make
sure you position your fabric correctly, and that you have enough to cover the
pattern piece. This newsprint paper is
sold in lots of quilt shops under the names of foundation papers or paper
piecing paper. You can save yourself
some bucks by going to an office supply store or an office supply on-line site
and ordering a ream of newsprint paper.
It’s the same thing, but you’ll have more money left over to buy
fabric. The 500 sheets will last you a
long, long time and it’s ink-jet printer friendly.

8 1/2 x 11-inch Newsprint Paper
My very favorite paper piecing foundation is June
Tailor’ Perfect Piecing Quilt Block Foundation Sheets. I really like these for two reasons: First, they’re sheer. You can easily see onto the right side of the
block pattern from the wrong side. And
second, you don’t have to tear them out of the block before you quilt it. Traditionally, all papers need to be removed
before you quilt the top, because it’s hard to quilt through paper of any kind
and when you wash the quilt, the paper will pull away and wad up (think of what
a paper towel looks like when you leave it in your pocket and put it through
the wash). However, these foundation
papers feel like thin interfacing and don’t necessarily have to be removed
prior to quilting. I do remove the
pieces that are in the seams to reduce bulk (I’ll show you this later on in
this blog), but the quilter can easily quilt right through the Perfect Piecing
Foundation Sheets. They come in 8 ½ x
11-inch sheets and easily go through the ink jet printers. Side note here – the ink jet printer
capability is important. More and more
patterns are coming out with CDs that have the paper piecing part on them and
require you to print those out. To have
something that will feed through your printer saves the step of printing the
patterns out on regular paper and then tracing them onto the foundation
paper.

June Tailor's Perfect Piecing Quilt Block Foundation Sheet
Side note number two here – Personally, I do not like
regular, standard 8 ½ x 11-inch copy paper for paper piecing for a couple of
reasons. First, sewing through this
paper dulls your sewing machine needle quickly.
Secondly, I don’t care how small you make your stitches, this paper is
difficult to tear away. It pulls on the fabric and can warp your block.
The block I’m using for this blog is number 87 in The
Farmer’s Wife Quilt. It’s called
Buckwheat and it was a candidate for paper piecing the moment I laid eyes on
it. It has lots of pieces and most of
those pieces have points and bias edges.
This is what the pattern looked like when I printed it off on the
Perfect Piecing Foundation Sheet.

And this is what the back looked like.

Remember, the back side of the paper is the
right side of the block, so it’s important that you are able to see all the
lines clearly. The ¼-inch seam allowance
is already there, too, so you don’t have to add that when it’s trimmed
down. If several colors of fabric are
involved, I have always found it handy to write the color on each of the
pattern pieces so I don’t make a mistake in color placement.

Also notice that the pieces are already
numbered. Most patterns that are paper
pieced do this for you. However, as a
quilter gets more experience with this technique, they may opt to change the
numerical sequence to fit their style, or can take a block that is not paper
pieced and devise their own foundation pieced pattern.

The next thing I do is measure the pieces in the block
and cut out pieces of fabric that are approximately ½-inch larger than the
square or rectangle patch. If it’s an
odd shaped patch, or one that is not symmetrical, remember to mirror image the
patch, since it will be flipped around on the other side of the paper. Not all quilters do this – some just cut a
piece of fabric they know will cover the patch and keep moving. I don’t.
I like to be a little more precise with the material I cut. Paper piecing takes a little more fabric than
traditional piecing, so I do try to be as judicious as I can, since I’m trading
fabric for precision. After I’ve made a
list of the patches I need, I rotary cut them out and put them next to my
sewing machine.


While we’re at the sewing machine, let’s talk feet for
paper piecing. With traditional piecing,
most quilters use some type of ¼-inch foot.

My Janome 7700 Quarter Inch Foot with the Phalange
In paper piecing, you’re dealing with some issues that your regular
piecing may not involve. It usually
involves tinier pieces, more seams, and an added layer (the foundation
sheet). So you may find it easier to us
a walking foot (also called a dual feed foot).
This is the one for my Janome 7700.

See the little two-pronged piece behind the foot? That fits into slots on the bottom of my foot
and it literally walks the fabric over the feed dogs, making seams,
fabric, and the foundation piece move as
a complete unit, so there isn’t any slippage.
This is what makes points sharp and edges even.

Janome 7700 Walking Foot with the Dual Feed Engaged
You will also want to shorten the stitch length on your
machine. Most machines come from the
factory with a standard stitch length pre-programmed in the machine. My Janome’s is set at 2.20.

I lower it to 1.8 when I’m paper
piecing. This shorter length perforates
the newsprint or the June Tailor Foundation Sheets more than the standard
stitch length and allows either one to be removed easily without tugging on the
fabric – which can warp seams.

Now, with the right foot on the machine and the stitch
length adjusted, we can start. So let’s
talk glue. That’s right…glue. The first piece of fabric will be glued to
the paper or foundation sheet, not sewn.
So it’s important to have glue that isn’t permanent and will release
smoothly, not stain, and will wash out completely. The perfect candidate is the pre-school glue
sticks you can pick up at almost any dollar store. It fits all those criteria!

Here’s where you’re going to have to follow me closely
(I really need to make a video…).
Remember the wrong side of the
paper/foundation sheet is the right side of the block. Trim a section of the pattern from the
foundation sheet, leaving about an 1/8-inch margin of paper around the cutting
lines.

On the wrong side
of the paper, on the first patch, apply a dab of glue
Apply the first fabric patch and finger press for a
second or two for the glue and fabric to adhere.

Take it to your cutting area and flip it over so that
the paper or foundation sheet is facing you.

Find a post card, index card or one of those pesky
cardboard inserts that fall out of magazines and position it on the first
cutting line of the foundation sheet.

Fold back the foundation paper so that there is a crease
along the cardboard.

You will need to trim the patch, leaving a quarter-inch
seam allowance. I use the add-a quarter
ruler for this because it has a grove on it and fits snugly against the
cardboard. Trim along the ruler, to
leave a quarter-inch seam allowance.


Now, with the fabric facing you, line up the next patch
of material.

Flip the patch over so that
the foundation sheet is facing you, and sew along the seam that is printed on
the paper.


Position your needle to sew several stitches before it
begins sewing on the paper, sew straight down the printed line and then stitch
a few stitches off the paper.

Take it to ironing board and press the front and back of
the section. It’s important to note that
you have to do this to each patch. Line
up, sew, press, and then trim the unit when it’s complete.


When you trim, line up a ruler along the printed cutting
edge of the section and use your rotary cutter to trim the excess fabric and
paper off. Once complete, the section is
really nicely cut and perfect.


Work on the next set of patches the same way. I know it’s a lot of sewing, then pressing,
and then trimming, but I believe it’s really worth it. And if you’re using a Fitbit to track your
steps, this is a great way to get in a few extra!


Once you’ve completed the next section, you will want to
begin to put the sections together to form your patch. Again, the paper piecing sewing lines and the
walking foot on your sewing machine make this a really easy process. You simply match up the edges and sew along
the printed line.
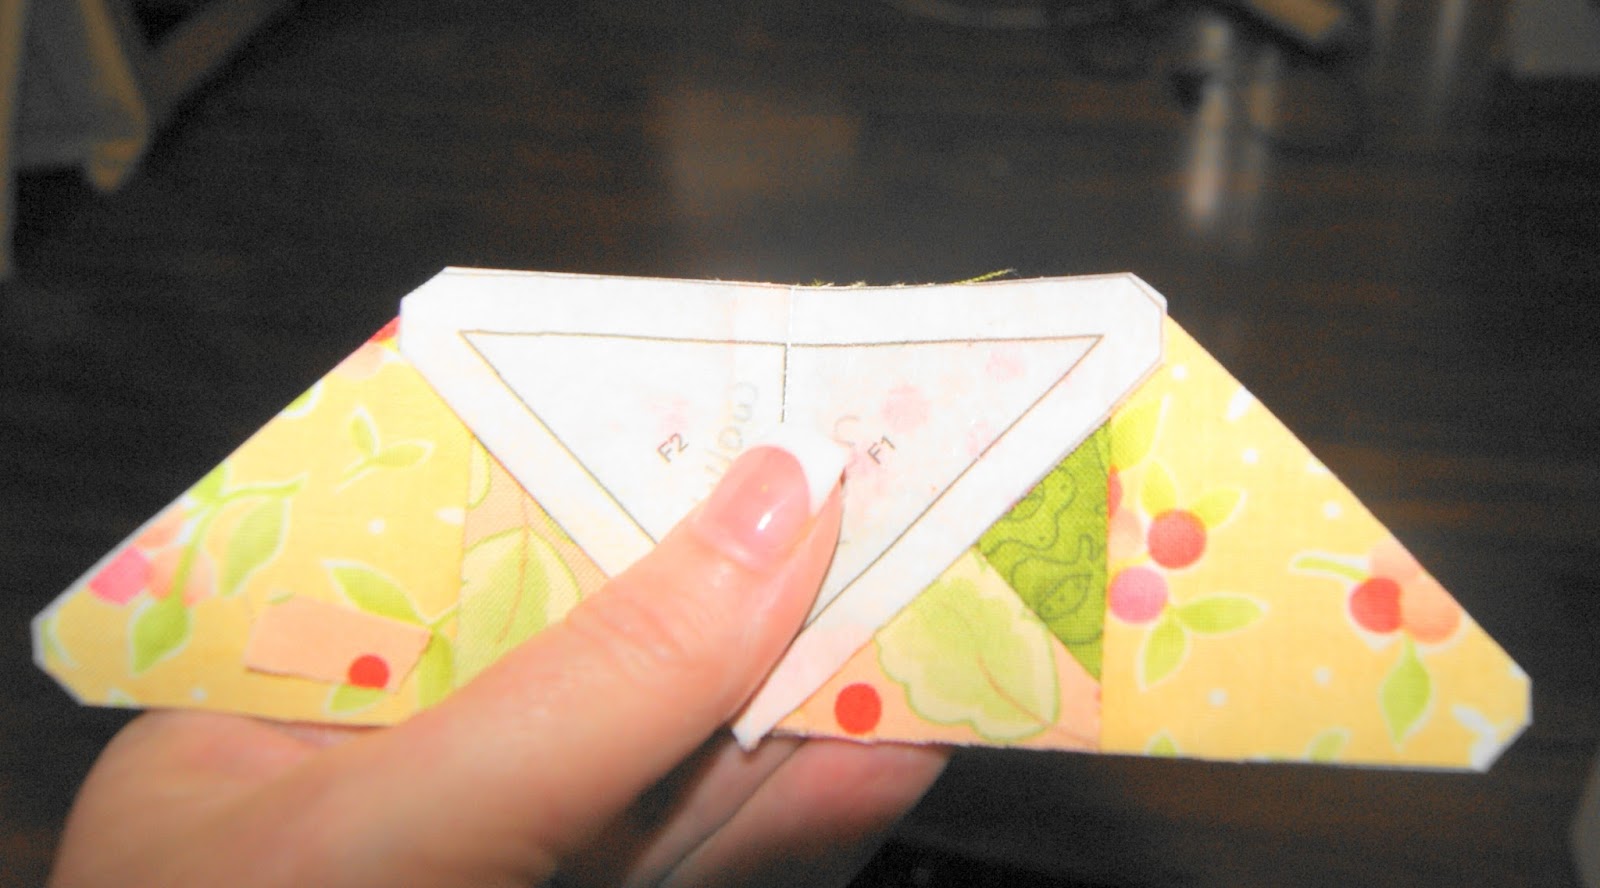

At this point, I’ve always found it helpful to go ahead
and tear out the papers that are in the seams.
This allows for better accuracy when putting all the sections together
to form the block.

Then take it to the
ironing board and press the seam open. This is to reduce bulk. Most paper pieced blocks have lots of seams
and pressing as many of these open reduces the bulk, which makes it easier to
quilt.

And there’s your first section, all nicely done.

Repeat the process until all the sections are complete.


Sew the sections together and you’re done! However, if used paper of any sort in this
process instead of the foundation sheets, the paper will have to be removed.

Here are two more blocks that I opted to paper piece
this week for my Farmer’s Wife. The
first bock was just a little complicated.

The second block had more bias sides that I wanted to
think about! It was just so much easier
to paper piece this block and have the extra stability of the foundation paper
to keep the bias from stretching.

If you’ve never tried paper piecing, I would like to
encourage you to give it a try on a simple block. Carol Doaks has several easy
(and free!) blocks on her website that you could experiment with. If paper piecing isn’t your favorite
technique, let me gently encourage you to at least get better at it. You never know when it will come in handy,
and it’s a great tool to have in your quilting tool box.
Until next week!
Love and Stitches,
Sherri and Sam

No comments:
Post a Comment