Monday, October 10, 2011

When the Idea Strkes...

So most of you know, I'm working on a block of the month call Patriots in Petticoats.  It's in tribute to all the women who assisted in American Revolutionary War.  "Assisted" is kind of a lame word to use, really. These women were spies, lovable liars, and often soldiers themselves -- putting both their lives and livelihoods on the lines for liberty and sweet freedom.  Anyway...the quilt has been an awesome learning experience.

I'm just about done with it.  Last month, I got the fabric and the instructions for the center medallion:

It turned out to be a large center medallion -- 24 inches x 24 inches.  After I completed the piecing and stepped back from it, the first thought through my head was, "Wow....that'd make a pretty Christmas wall hanging or table topper, because it looks kind of like a Christmas wreath."

And it just so happened that the next day was my monthly sewing bee at Hancocks.  And it just so happened that Hancocks had just gotten in their new line of My'liss Christmas fabrics.  And it just so happened that $18.35  and five days later I have two Christmas table toppers, one of for me and one for Mom

Moral of the blog?  I'm not sure there is one, but I would encourage you as you're quilting, piecing, or browsing through quilt magazines, to look beyond what's in front of your eyes and think outside the box.  Don't be afraid to use alternate colors or new themes.  The colors and fabrics that are available to quilters today are extra ordinarily beautiful and bright.  If you're a "traditional" quilter, don't be intimidated by batiks and the bright jewel tones that are out there.  Embrace them.  Let them empower you more as a quilter. 

Likewise, if you're one of the new "rebels" of the quilting age, try some traditional blocks with reproduction fabrics.  The new lines of American Revolution and Civil War prints are amazingly accurate and wonderful.  Try some. 

Above all, think out of your comfort zone.  Stretch yourself as a quilter and as an artist.  Good things can only come out of it!

Wednesday, September 28, 2011

West Virginia Memories is Pieced!

Two quilt tops down in less than two weeks!  Go me!  However, I won't discuss how long it's going to take for me to quilt them....

Wednesday, September 21, 2011

Kinda sorta almost finished....

I've got my Mothers-of-the-Bible quilt together!  I've just got to applique the borders and quilt it!

Sunday, September 4, 2011

Soooo busy....

My quilting life is getting hectic.  I've been asked to teach two additional classes this fall!  I'm so excited and so busy!  I'm on my last block of the Mothers of the Bible quilt and only have five more blocks for my West Virginia Memories quilt.  I think top-wise, it's been my most productive year yet.  I'll have pics up soon of both of those quilts.  Meanwhile, Ellen was back in town last weekend and she brought massive amounts of show and tell for inspiration.  She inspired me, so I hope she inspires you. The top pic is Ellen holding the Disney Princess quilt she just finished for her newest soon-to-be-born granddaughter.

Beginnings of a crazy quilt....

Reversible quilted placemats

Water lily pincushion

Fabric Basket

Twisted Christmas Wreath

And the rest of the pictures are the squares from Ellen's Hop-to-It Quilt


When I finally retire, I hope I can be as productive as Ellen is!

Friday, August 12, 2011

Where Have I Been?

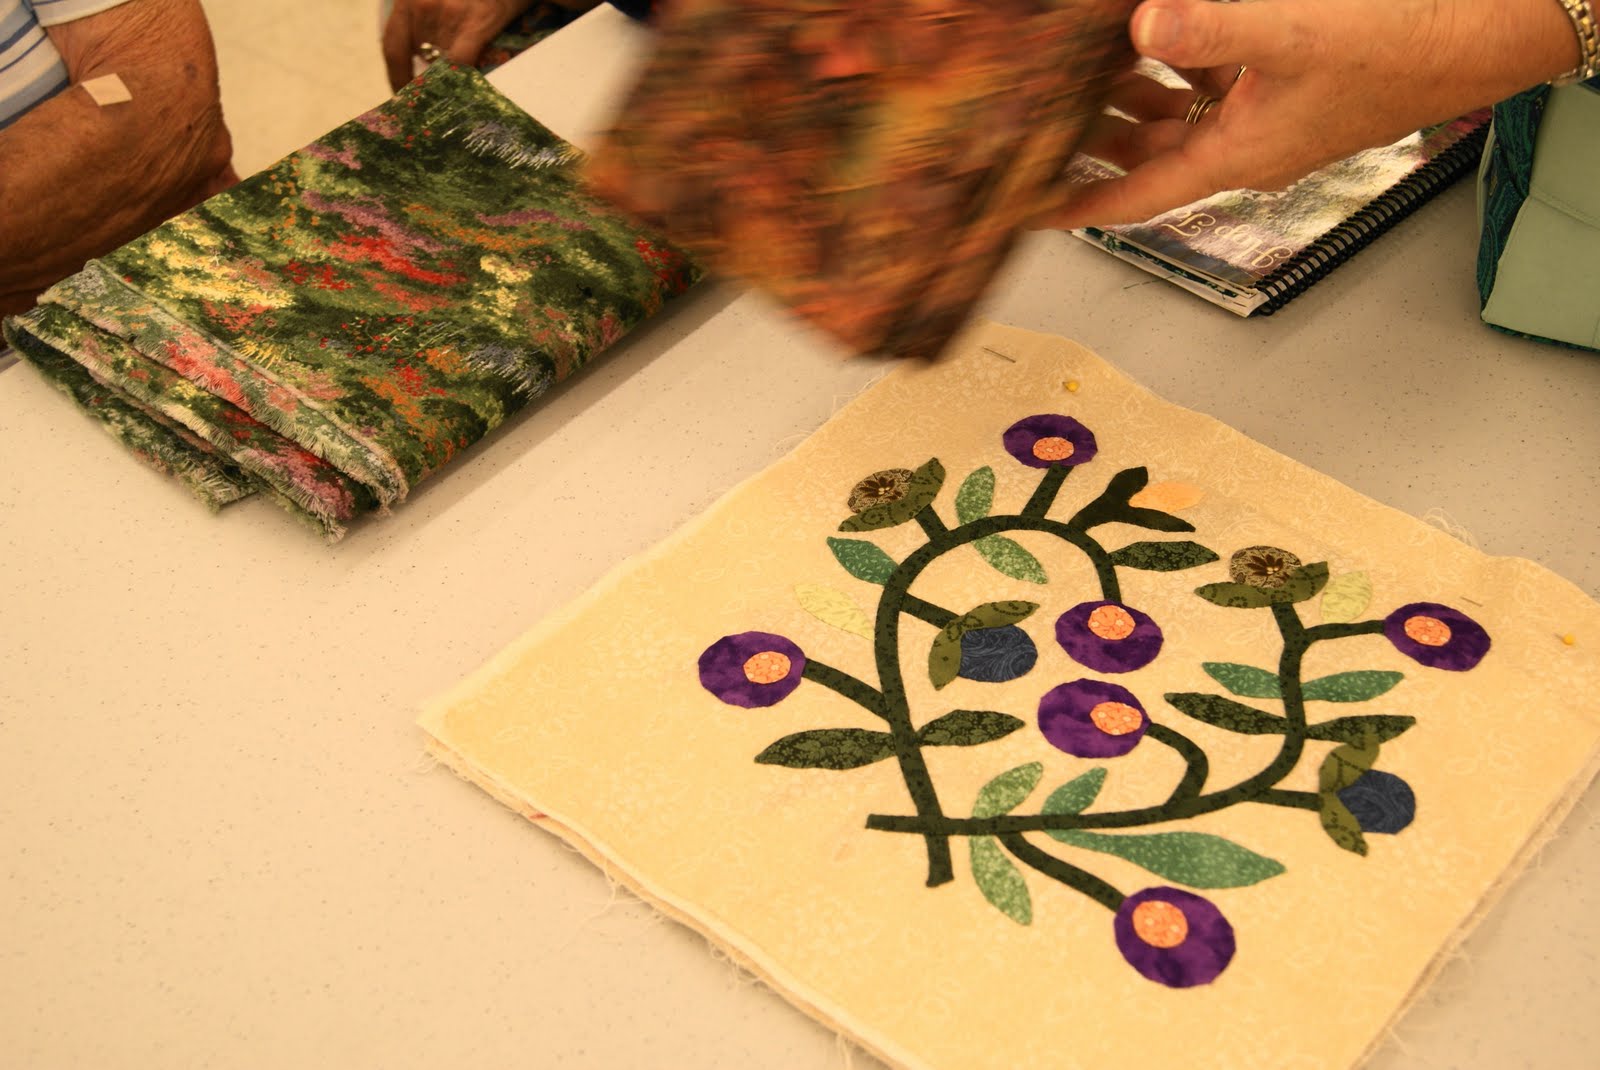
On vacation...the whole month of July and am still "vacating" even as I write.  I decided to take the month of  July off to try to get some projects finished and get ahead in the classes I teach.  I was asked to teach another beginners quilt class starting this fall, so I also had to deal with possible new lesson plans to a whole different group of quilters.  There is still some discussion on whether or not this group will actually be beginners or intermediate/advanced beginners.  So there was much rifling through patterns and thinking and planning.

My son finished college at the end July and wanted to take one more family vacation before he started work, so that is why I'm still "vacating" in Atlantic Beach, NC.  The month off has been nice, but I'm ready to get back to my schedule, my quilts, and my quilting friends.

Of course, while traveling, I've hit quilt shops and talked to quilters.  It was while I was at one of these quilt shops a woman asked what I considered my "I-gotta-have-these-with-me-at-all-times" tools.  There are several I keep in a Vera Bradley pouch.


Inside, I keep all these...
These are tools I simply can't live without....

The first are marking tools that can be picked up just about anywhere...a fine-tipped marker for marking templates, a #2 mechanical pencil, an eraser stick, and another pencil, just in case the other pencil runs out of lead.  The pencils are great for use on the wrong side of the material or for making notes.

These are for marking the right side of the fabric -- in other words, they wash out quickly and easily.  One of the Fons and Porter mechanical pencils holds white lead for dark fabrics and the other holds dark lead for light fabrics.  There is also a chalk marker with additional white chalk and colored chalk and a sharpener.  The black sponge can be easily dampened with a drop or two of water to remove the chalk marks if  I make a mistake and the F &  P pencils come with their own erasers and extra lead.

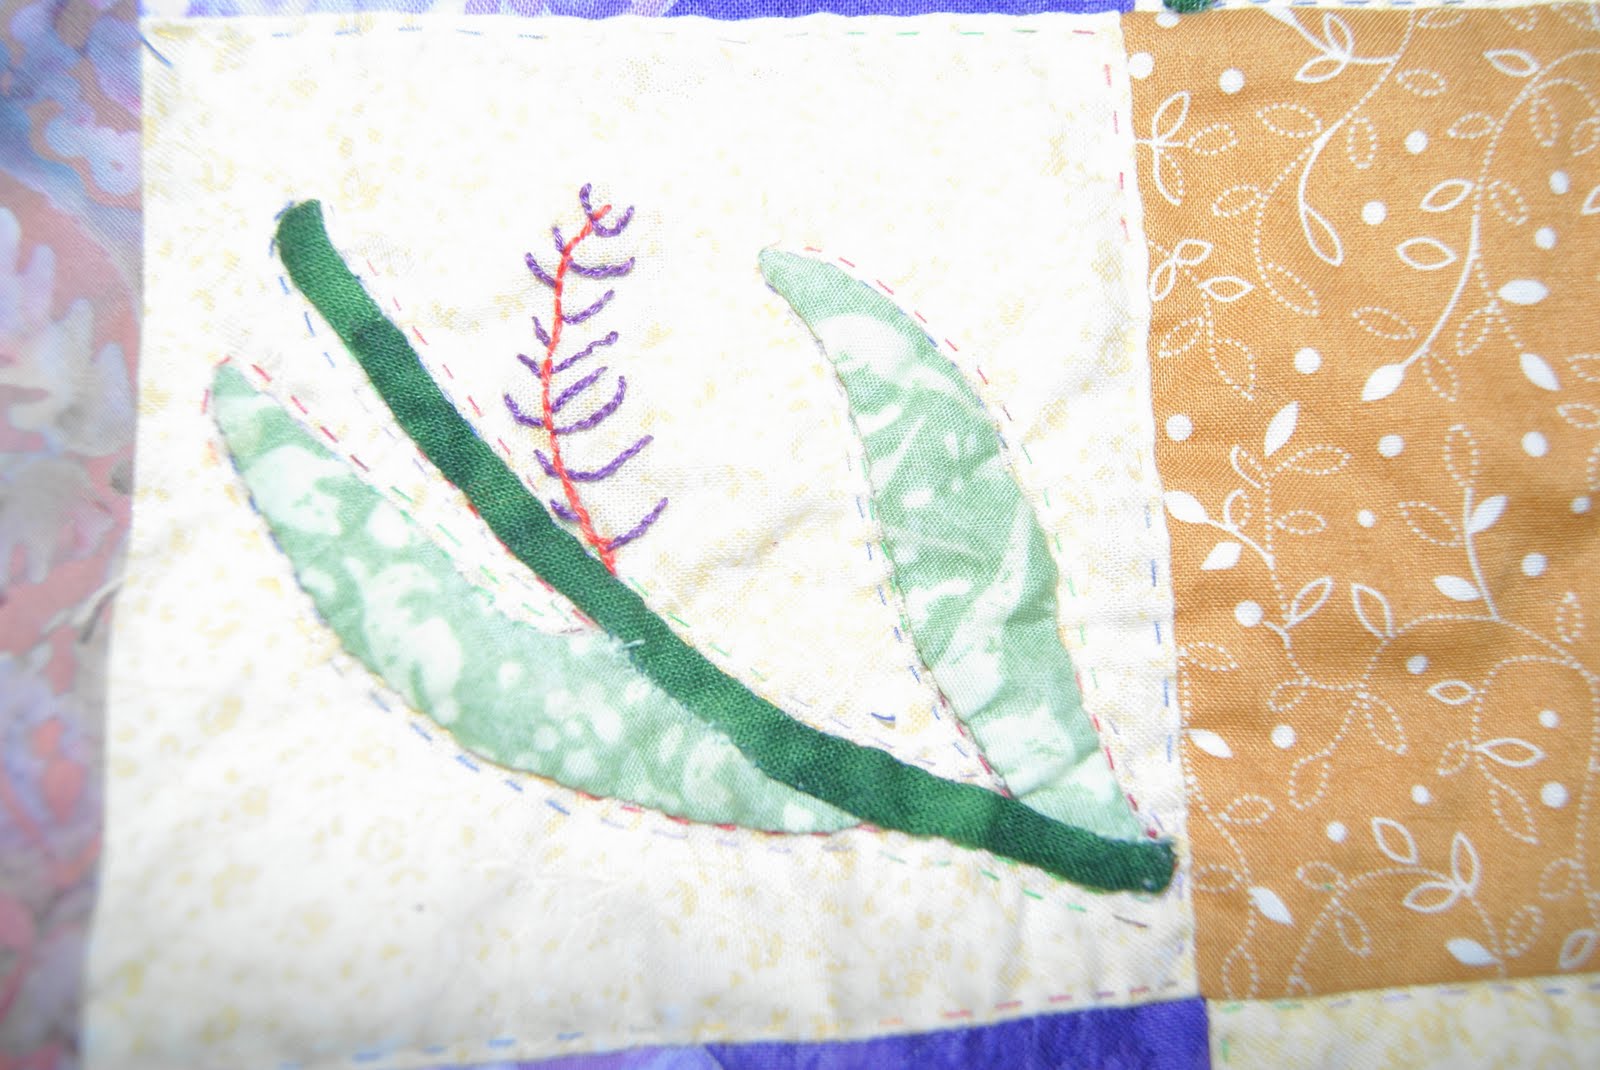
I also keep an Add A Quarter ruler -- the small version -- the large version stays in my quilting kit at home.  This is the yellow ruler at the top.  These are wonderful for paper piecing, English paper piecing or just quick  measuring.  The next, the blue plastic strip, is a half-square triangle marker.  Below is a two-pronged awl, which has saved my fingers many times both sewing and ironing tiny pieces of fabric.  And finally a toothpick.  I cannot applique without a toothpick.  A moistened toothpick is wonderful for turning under fabric when you're doing needle-turn applique -- especially the corners and curves.
Two pairs of scissors.  The ones at the tops are actually called lace scissors and are used in French heirloom sewing.  The flattened edge makes these great for cutting the backs off large appliqued pieces.  They allow you to get between pieces of fabric without cutting through the front of the applique.  The scissors with the green handles are serrated applique scissors.  The blades have tiny "teeth" that keeps the fabric from raveling too much.  I just bought them and absolutely love them.  They are by Karen Kay Blakely and I do not leave home without them!
These don't fit in my tiny pouch, but they stay near it.  The thread is specially made applique thread from Superior Thread Company.  It's a little pricey, but it lasts a long time.  I used to applique with nothing but 100% silk thread, but always had trouble keeping my needle threaded because it was so slippery.  This thread is 100% cotton, fine, and the colors blend wonderfully with just about anything.

A needle keeper.  You can keep your threaded needles in here.  This works great when you're appliqueing several colors of cloth and you have to keep several needles threaded.  The threads don't tangle.  And the best part about the bobbin holder and the keeper?

They nest!


And finally, I keep applique pins with me.  These are much smaller than the standard pins most of us keep on hand, even smaller than the dressmaker pins.  Some quilt stores sell these, but if you can't find them there, go to just about any craft store and look for sequin pins, which are usually located in the make-it-yourself Christmas ornament section.  They're the same thing. 

Wednesday, July 27, 2011

Dear Jane

Open to question to anyone out there who will answer...

Has anyone worked on a Dear Jane Quilt?

Several women in one of the bees I attend have started a Dear Jane quilt and they would like me to join them.  I understand the blocks are tiny...I understand the book has no instructions...

I'm already teaching two classes and leading the Quilting Cuties bee at Hancocks.  I'm just wondering how much frustration (if any) is involved in the Dear Jane process.  I'd love opinions and answers....

Thanks!

Thursday, June 30, 2011

Southern Album Quilt -- Progress!

 I've finished hand quilting the first section of my Southern Album Quilt....


Sunday, June 26, 2011

It's the Color of Money...or the Color Purple... or the Color of the Rainbow...

I love color.  And I've found through my post-graduate studies in education, that I'm a visual learner (like most people) and this makes me even more sensitive to color. There are colors that make me instantly happy, and there are colors that depress me profoundly.  For instance, the first thing you will notice when you walk in my house, is that my living room is painted yellow.  I like yellow.  It makes me happy.  As a blond with blue eyes, I can't wear yellow very well (it makes me look sallow), but it's my "happy color."  I can be in horrendous mood when I come in from work, but those yellow walls?  They make me smile.

I found this out the hard way.  For years  my living room was a very stiff and formal affair, with hard Burgundies and deep greens, thick carpets, and dark, formal furniture.  Bill thoughtfully suggested one day that we refurbish the room, complete with new furniture.  He'd take care of the whole thing, the only stipulation he put in front of me was that I had to trust him with everything...from the colors on the wall to the flooring beneath my feet.

I'm  a control freak.  This was hard.

But I am so glad I let him.  He asked me what flower always made me smile and without hesitation, I said "Daffodils."   I've always loved them -- ever since I was a small girl.  They signaled spring and warmer weather and Easter.  Plus, they always looked happy.  I came home from work and he had painted the walls the softest daffodil yellow.  And to this day, those walls still make me smile and get rid of the worst post-work mood I can possibly have. 

So I tell quilters to always put a "happy color" in their quilt.  One that will always make them smile...and one they'll always have good memories about when they look at their quilt.

Color and quilts can be intimidating.  When I first began quilting, I was petrified to try to chose any of my own colors.  My quilts looked as close as they could to the picture on the cover of the pattern.  I was even happier if I could order a quilt kit -- that took all the guess work out of picking any colors.  Now, after about 15 years later, I'm over that hurdle.  If anything I have to reign in my color choices. 

And I could write a whole book on color and the color wheel and how to balance your lights and darks and hues.  But that is a book and this is a blog.  Maybe one day a book will come out of this blog and if it does, I will tackle the color issue and spend pages discussing it.  However at this time let me just illustrated this.  Below are three blocks:


These blocks aren't perfect...they are working models for a project I'm designing.  However, my point is they are the same block pattern.  Notice how the color choices makes them look different. The first block appears to have some parts of it that "float" since the background and some of the triangles are the same color.  The second block is a bit richer, but parts of it are tone-on-tone and white has to be added to the block somewhere to add sparkle and definition.  The third block looks much more traditional and scrappy.

My point?  Don't be intimidated by color.  It's a tool in your toolbox as a quilter.  A very important one, too.  It adds character and definition and breathes life into your work.  Color is not defined by a set number.  I've seen some beautiful two-color quilts.  I've also seen quilts that seem to have all the colors of the rainbow in them and are a riot of tones and hues, and are also just as beautiful.  My advice to you?  Begin with four or five colors.  Make sure one is a focal fabric -- one with lots of color.  Let the other colors you select harmonize with the focal fabric.  Make sure one of the fabrics is one you can't live without.  Play with them.  Mix and match.  Switch them around. 

Have.  Fun. 

The color police aren't going to slap the cuffs on you and haul you to quilt jail.  Remember there are very few mistakes that can't be fixed and very few mistakes you won't learn from.Above all, don't be afraid of color.  Dive right in.  Remember how excited you used to get over that huge box of Crayolas?  Think of your fabric as your grown-box of crayons.  Enjoy!

Saturday, June 11, 2011

Which Quilting Method Do I Use?

A good question.  And the answer to that is "How did you piece your top?

If you machine-pieced your top, then it's perfectly fine to either machine quilt it or have it long-armed by a professional quilter.  You're matching like to like...machine-pieced to machine-quilted.  There's nothing lost.  And either method quilting method -- either the use of a regular sewing machine or a long-arm -- will look wonderful. 

If you've machine-pieced most of your top -- say 80 percent and above -- then it's still fine to use either machine method of quilting on your top.  And again, both methods look beautiful.  If you go to my facebook page, (http://www.facebook.com/#!/profile.php?id=1514363689) I have several quilt show albums up.  Practically none of those quilts are hand quilted. 

But when you get below the 80 percentile on your quilt top, the waters get murky.  What work was done by hand?  Did you just set some Y-seams in?  Or did you hand-piece the entire thing?  Does the quilt have lots of needle-turn applique?  The more handwork a quilt contains, the more you seriously have to consider hand quilting it. 

I know... I know...it's time consuming...it's a committment...But in my opinion, it's necessary.  To put any machine on a quilt that's at least 50 percent handwork devalues the quilt.  And I'm not just talking about monitary value.  We all know that quilters will never be paid what our art is worth.  To have machine quilting of any type on a quilt that is heavily hand done just doesn't look right. 

This was the issue I had to deal with on my Southern Album Quilt.  Every block in that quilt top had hand applique on it.  Four of the blocks were completely needle-turn applique.  I had already spent so much time on it, I was simply anxious to finish it.  Machine quilt it, long arm it...I really didn't care, I just wanted it done and over.

Luckily cooler heads at Dragonfly prevailed and talked some sense into me.  I'm hand quilting this one and it's going to take a year to eighteen months of my time to complete, but I don't regret the decision.


After so much handwork on the whole cloth appliques, any visible machine work would have looked off-kilter.  The blue lines visible under the quilting stitches are chalk and will easily brush off once I'm finished.

On some of the blocks, I quilted around the shapes and then went in with a 1-inch x 1-inch cross hatch.

On some of the other blocks, I followed the book but essentially "listened" to what the block was telling me.  I like a lot of quilting, as you can tell.

The blocks with embroidery have given me the biggest brain burp.  I'm still working through exactly what to do with them.

Saturday, June 4, 2011

How Do I Quilt this Crazy Thing?

I've quilted for over twenty years.  Now that does not by any means make me an expert.  Nope.  There are many women and men out there with more experience and talent than I have.  I also teach a couple of classes and lead a bee, all of which cycle through more than their fair share of beginning quilters.

Beginning quilters are fun to work with.  They're enthusiastic and that is contagious to those of us "old timers" who have been around the quilting block more than one time.  But all of us quilters -- beginners, intermediates, and advanced -- suffer from the same syndrome.

How do I want to quilt this sucker?

Beginners want to get it over quickly.  They've already spent weeks or months pieceing their top and they're ready to move on to another project.  So quite often this group's attitude is "hurry up and let's get this over and move on to bigger and better things."  And if there's an OCD quilter in any group, she's going to want to completely finish one project before moving onto the next.

Sigh.

Slow down, people.  Just. Slow. Down.

First of all, if you are the slightest OCD about your projects, let me assure you, you will get over it.  I have about four UFOs (Unfinished Objects) in my quilt room at all times.  I've learned I need this.  I can't just quilt or hand applique and not have something to sit down at my sewing machine and piece, too.  I have to have hand work and machine work going at the same time.  Likewise, if I'm hand quilting, I realize that it's going to take a long time (a year to 18 months in most cases) for me to finish quilting a project.  You get tired of it.  You want and need something "new" to play with for a week or so to refresh your mind and your quilting soul.  So four UFOs for me is normal.  If I was to commit to one project start to finish with no breaks?  Bill would have me committed. 

But I digress...

So you've pieced your top, the next question is "How am I going to quilt this thing?"

Quilting, by definition, is the sewing together of a fabric sandwich.  You take the quilt top, batting, and the quilt backing, layer them together in a "sandwich," with the quilt batting being the "filling" and sew or tack all three together.  If the quilt top, batting, and backing are bulky, the quilt may be tacked.  A tacked or tied quilt is a quilt where instead of stitching a quilt pattern to hold the three layers together, a series of ties are used spaced evenly all over the body of the quilt.

But if a quilter wants the traditional quilted look, she's now faced with three options:  hand quilting, machine quilting, and long-armed quilting.   All three are pretty on a quilt, but all three are very different in precedure and technique.  And the type of quilt top you've pieced is the lead actor in which quilting method you decide to use.  My next blog will discuss all three methods and how you consider each one.

Until then, happy quilting!

Sherri

Friday, May 27, 2011

My New Studio

I have a quilt studio in my present home.  For a while, I operated out of my bedroom, but as the years went by and the fabric addiction grew, it quickly became apparent to Bill that I needed my own space.  Luckily (and thankfully?) about this time, my children decided to grow up and leave home.  Quite convenient timing, if I do say so myself. 

So I took one of their bedrooms and turned it into a quilting studio.  I have cubbies along the back wall that hold my stash, an overflowing bookcase full of quilting information and patterns, a center cutting island, thread cabinets, a closet to hang works in progress and a nice, sunny space for my sewing machine (a Janome 7700, affectionately known as "Big Red"). 

My mother-in-law passed away at the end of February.  She lived in a big, old, Southern style farmhouse that has a bay window and 3200 square feet...about 800 more square feet than we have now.  Through a series of events, Bill and I have ended up with the house.  For a while we simply walked around in it and wondered what in the world we were going to do with it.  Fix it up and sell it?  Sell it as is?  Offer it to another family member? 

But as of right now, I think we're going to move into it.  There's some work that needs to be done and it is underway.  By the end of this summer, my address should change and two empy-nesters will try to figure out what in the world to do with all that space.

The defining factor in this move?  Well, for me, there were two.  Once we discovered the original oak floors in the 1930's living room....

And refinished them...
But the deal-sealer was the room that is to become my studio.  Three times as big as my present one, it has space for a larger center cutting table, lots of outlets, a closet for fabric storage (out of the light, no fading), space for a design wall, and plenty of room to move around in...

Friday, May 20, 2011

Where Are All the Quilt Stores?

I am a small business owner.  In my "real life," my husband and I own a demolition and environmental company in High Point, North Carolina.  This means that not only can I tell you what is the best way to piece together a quilt block, but I also can tell you the asbestos regulations for the state of North Carolina.  Chapter and verse.

But as a small business owner, I am keenly aware the threat that "big box" businesses are to the small business owner.  Walmart (God bless them), Barnes and Noble, and Home Depot are the reasons that the neighborhood general store, book store, and hardware store went the way of the butcher shop.  Thankfully, as far as our business goes, we're small enough to be flexible, big enough to maintain a decent payroll roster, and too tiny to be a real threat to any of the big boys in our sandbox.  We're riding out the recession with hopes of selling the thing and retiring in the next couple of years.

I mention all that for this reason.  Last week I was able to take a business trip with Bill to Asheville, NC where we were estimating two jobs.  I Googled quilt shops in Asheville and found a couple I wanted to see.  And Bill was happy to comply as long as I let him fly fish for a couple of hours one afternoon.  So after we looked at the two projects in downtown Asheville, I programmed our GPS for the first quilt shop.  It wasn't too  far, but when we pulled up to the location, the shop was no where to be found.  Another shop (a fish market, of all things) now had the space and the current owner of said fishery told us that the business had shut down months ago. 

"Well, darn..." I thought as I programmed the address of quilt shop number two into the GPS.  Fifteen minutes later, we arrived only to find that the second quilt shop had also closed. 

I was fuming and Bill was chuckling at this run of bad quilting luck.  Then as we turned the corner from quilt shop two, we both discovered why both of the independent stores may have had to close.

Hancock's.

Now I'm a Hancock's shopper.  My bee meets at Hancock's.  I do buy quilt supplies at this store.  However, if I want quality fabric, quilting information, and just some time to hang out with fellow quilting addicts, Hancock's is not my choice.  I go to Dragonfly or Ye Olde Forest Quilt Shoppe.  However, in this case, I'm afraid it was a big boy entering the quilting sandbox that ran the two tiny kiddos out of the playground. 

Small, independent quilt shops are an endangered species, my fellow quilter.  Please, please, please support these wonderful women (and men) in their entrepreneurial endeavors.  If you don't, we may all end up shopping on the web...which is not necessarily a bad thing.  But these stores are a form of support, information, and education for all quilters.  The big stores such as Hancock's, AC Moore,  Hobby Lobby, and Michael's aren't.  The independent quilt shop fills a niche that no other store can.  Shop there.  Buy there.  Go to class there.  Spread the cash and the love.  Keep them open and running.

Sunday, May 15, 2011

Mothers of the Bible Quilt

I mentioned in my March 27 blog that the quilting bee I belong to has started a new quilt for the year.  And since I'm "facilitating" this wonderful group of women, I'm in charge of directions...which normally isn't a challenge....except this time it is. See, the directions for this quilt are simply some line drawings with the instructions to "copy the drawing and 1/4 inch to each piece and sew together."  Which sounds simple...except it isn't. 

Some of the blocks go together easier if their paper pieced -- templates just don't work.  The pieces are too tiny to be accurate if you use templates.  And the paper piecing has to be carefully done for the same reason.  The pieces are too tiny.  The big adventure for me every month is to find out which method works the best (and easiest) for each block.  Some of the blocks I've been able to successfully convert to rotary cutting procedures, which makes me (and everyone else in my group) happy.  I'm afraid even the oldest members of this bee are now spoiled to rotary cutting. 

The upside is that a few of the blocks are all applique and the members of this group have quilted and pieced long enough that each one knows which applique method works best for them.  No instructions are needed for those blocks -- thank Heaven!

This quilt is really stretching my abilities as a teacher, facilitator, and writer.  I challenged -- something I really enjoy.  My quilt is jewel tones and will be set on point with black and turquoise sashing.  I've let my love of color run rampant with this one.

 Garden of Eden

 Sarah's Choice


 Wandering Foot

Welcome Hand
Double Cross

I'm working on Lover's Knot.  From this perspective, you can see just how small some of these pieces are.