Thursday, February 27, 2014

Machine Applique, Part 2

When we last left our applique, it looked like this...

And the picture of the completed pattern looked like this...
So there is still serious work to be done.  I told you I think in groups of threes for applique.  The next pieces that have to go down (again, you have to think from the background forward) are the pumpkins, which are actually several pieces -- the darker, orange circles, the lighter parts on the front of those to give the pumpkins depth, the leaves, and the stems.  When you're working with pieces that have several parts, it's a good idea to fuse as many of those together as you are able before you fuse it all to the background.


In this case, we can fuse the lighter orange pieces to the darker circles before we fuse them all to the background.


At this point you can then fuse the stems, then the pumpkins, and then the leaves to the background

Then carefully stitch around each part


Okay...first group is complete.  Now, if you look again at the scarecrow and think background to foreground and in groups, the next items that have to be fused are the pole, the pants, the hay, and the patch on the pants.  The patch is such a small item, I think you can either fuse it to the pants before you fuse the pants to the background or after you get the pants on the background.  Either way, I had to center the pole and keep working from the back to the front -- hay, pants, patch.  Once it was all down, I stitched around it.


Then next, I grouped the coat, the hay for the arms, the shirt front, and the collar.


And then I stitched all around this group.  I did not take the time or the trouble to stitch around all those little hay springs.  That was just too tedious and if they fray a little, well....they'll just look more like real hay.  We will call this artistic license and move on (grin).

When I go over some more machine applique with this piece, I will finish it up, but will also talk about embellishments, such as buttons, beads, and hand embroidery.  These are some of the reasons I love all kinds of applique -- you get to use so many other techniques and materials that aren't "typically" on quilts.  

Machine applique isn't any harder than needle turn applique -- it's just different.  Like hand applique, you have to think from the background forward.  And when you're a beginner, this can sometimes be tricky.  If you're fairly new to any kind of applique, I would encourage you to pick a piece that is fairly uncomplicated with few pieces.  Then as you gain experience and confidence, advance on to more difficult patterns.  I wouldn't necessarily recommend this scarecrow to a real beginner.  The last few pieces we will put on are small and it's going to take some skilled machine sewing for those.  

Where machine applique differs a little from hand applique, is that thinking in groups helps.  Most often in needle turn the quilter can think one piece at a time.  But because you're fusing and then sewing, grouping is essential.

Getting the zig zag or blanket stitch down pat takes some time and skill, too.  The stitch needs to be neat, the quilter has to feel in control of both the machine and the stitch, and it takes time to decide on the best speed for you.

So give yourself time and lots of practice.  

Love and Stitches....

Sherri

Wednesday, February 19, 2014

This Thing Called Machine Applique

It's no secret that I love needle turn applique.  It's portable, it gives me more control over tiny pieces, and it has a soft look.  My love for needle turn is boundless to the point I'm afraid I became the dreaded applique snob.  Most of the time I wouldn't even consider machine applique on anything.

But my, my how things do change.  Enter one granddarling, Evangeline.  No way hand appliqued baby quilts could hold up to the constant machine washing.  And time...hand applique does take lots of time and it seems the older I get, the more hectic my schedule becomes.

And by the way, have you seen the beautiful laser-cut applique pieces that have come out with the fusible backing already on them?  They have to be machine appliqued, but they are gorgeous and are such time savers!

So I decided that machine applique and I needed to get re-acquainted.

My guild's next Round Robin was coming up, so I picked out a pattern.

For those of you who are working through At Piece with Time, you know that Kristin Steiner and Diane Frankenberger number the applique pieces on the layout so the quilter knows the order the pieces are stitched.  Not all patterns do this.  Sometimes, as in the case of this scarecrow, you have to be able to look at it and decide for yourself which pieces go down first.

In any applique piece, you start from the background and work forward.  I also tend to think in groups of threes most of the time.  Look at the picture.  What is the item that is farthest in the background?

The hill.  And it goes down first.

We're going to start with prep work and go from there with this hill.

Besides picking your fabrics, the first item that needs to be decided upon is the fusible to be used.  There are lots of ones on the market and you just have to try them out and pick which one works best for you and your machine.  The second issue the quilter has to determine is if the pattern is reversed or not.  We've already dealt with this in an earlier blog.  Patterns that already have their applique pieces reversed will tell you so somewhere on the pattern.  If they're not reversed, you will need to go through the steps to reverse them (again, these are in an earlier blog).  I was lucky that my happy scarecrow fellow was reversed, so all I had to do was trace the pieces onto my fusible web.


And then construct my background block.  I did baste across the middle both length and width-wise to make sure I centered my design.


Fusibles are like anything else on the market.  Each has their own set of instructions and it's important that they be read and followed.  So fuse your first piece down according to instructions.


Lots of beginning appliquers get a little overwhelmed at this point.  Like any other types of applique, machine applique has several steps.  It's just important that they be taken one at a time and don't be in a rush.  However, if you think you can simply fuse the pieces and continue on without stitching them down someway, you're wrong.  There has to be some kind of stitching around the edges because the fusibles are meant to be a temporary hold, not a permanent one.  
It's also important to think in groups as you applique.  You don't fuse everything down and then stitch around everything.  Grouping helps you keep your stitches neat.  

Now comes the next decision -- do you use one color of thread around everything, change the color of thread to match the fabric, or use mono filament thread?

Using one color of thread (customarily black) around the entire design works well on a children's quilt because it can make simple shapes resemble drawings in a picture book or coloring book.  If feedsacks or 1930's reproduction fabrics are used, black works really well because it gives a quilt an "authentic" Depression Era look since black was often used to outline applique shapes during that time period.

Mono filament thread runs the gamete.  There are some really good kinds and some that are not so good.  If you're using a lot of different colors in an applique piece, mono filament is the easiest choice because you don't have to stop and keep changing thread to match the fabric color.  It is also nearly invisible, so the applique pieces appear to "float" on top of the fabric.  Regular cotton thread should be used in the bobbin.  Mono filament comes in clear and a dark  color to match darker fabrics.


This is my favorite brand of mono filament.  It doesn't break easily and plays nicely with a hot iron.  But again, like fusible webbing, each type comes with its own instructions.  Please follow them to get the best results.

Most of the time I choose to change my thread to match my fabric.  I'm not sure if this is because I made clothes well before I quilted and you have to change thread color often when constructing garments, or I just like the look, or if it's because since I did make clothes,  I have lots of colors of thread to chose from.  If you choose to do this, then you have to decide if you want the sleek look of a rayon-based thread or the homespun look of cotton.  Since my little guy is a country scarecrow, I picked cotton thread for this design.


Now with all these decisions made, we're still not quite ready to stitch yet.  A stabilizer is needed on the back of the fabric.  If the fabric doesn't have something on the back of it to allow it to glide over the feed dogs, it can catch and pucker.  And stablizers are like fusibles.  There are a lot of them on the market to pick from.  Some quilter even use foundation paper.  I've known some to use coffee filters.  It's a personal choice.  My favorite is this:


This stabilizer is primarily made for machine embroidery, but I think it's wonderful for machine applique.  It fuses to the back of the block and when you're done it tears away easily and what doesn't tear off can easily be spritzed off with water.   But again, stabilizers are like fusibles.  You have to find which works best for you and your machine.

Now the last decision needs to be made:  What kind of stitch will you use?  The usual applique stitch is a zig zag.  Usually have to shorten the stitch length of the zig and the zag and shorten the width.  The length and width is particular to each machine and the applique appearance you want.  I do use the zig zag stitch, but my favorite applique machine stitch is the blanket stitch.  Most sewing machines have one of these.

On my machine, I have several choices for this stitch 41 -- 50 actually.  My favorite is 45.  Either stitch you decide on, blanket or zig zag, it's important that the stitches are balanced and the bobbin thread doesn't pop to the top.  A correctly balanced stitch looks like this:
The horizontal part of this stitch needs to be snug against the outer edge of the applique piece so the vertical part of the stitch can "bite" into the applique.  Set your open-toe foot up with the needle flush against the outer edge of the applique piece.

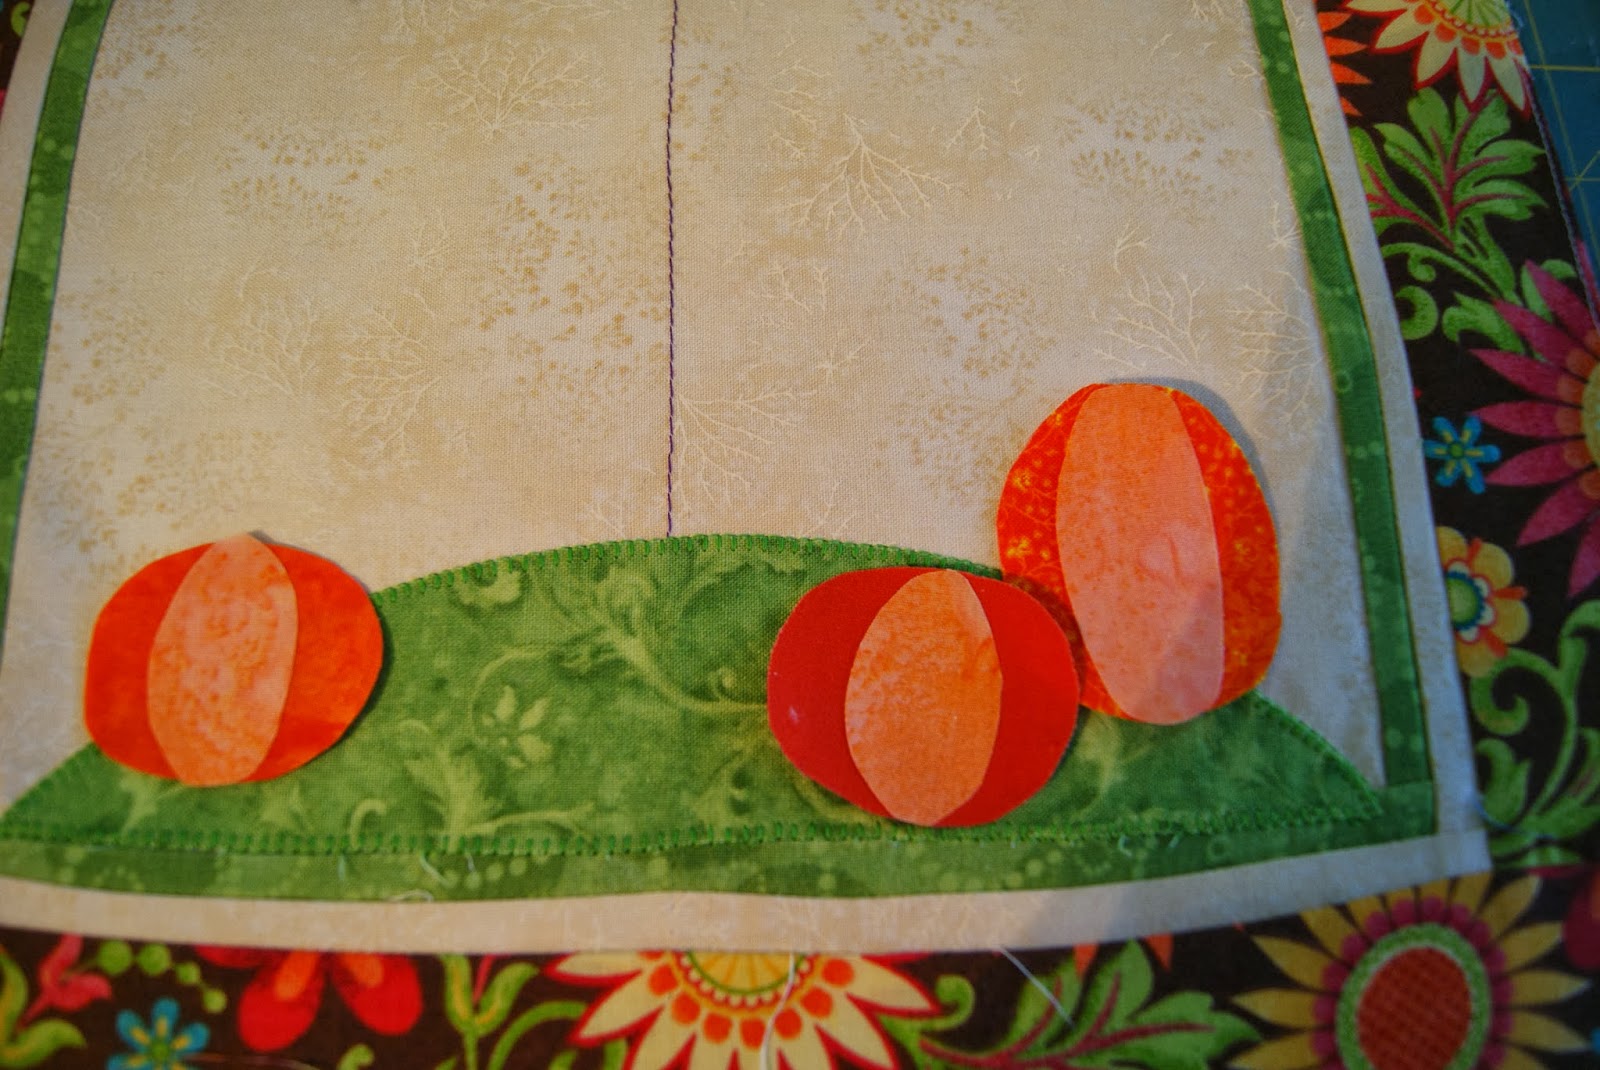
The first stitch will fall along the outside edge of the green hill.  Then the needle will swing to the left and the stitch will fall inside the hill.

Speed is not your friend when you're appliqueing by machine.  You will lose control of the stitch and the fabric.  Start slow and find a medium speed you're comfortable with.  Slow down for curves.  In the next blog, we will deal with 90 degree angles.  Those are done a little differently.

That's what it should look like on the right side.  The stitches are there and blend with the hill instead of fighting against it.

This is the back.  Again, examine the tension of the stitches.  Nothing is pulling or puckered.  It's balanced and looks neat.

The next blog on machine applique will deal with 90 degree angles and grouping pieces.  This isn't difficult, but it is a bit different than needle turn.

Find a simple pattern and give it try!

Love and Stitches...

Sherri

Thursday, February 13, 2014

At Piece with Time: Block Three -- Grandmother's Favorite

I love the name of this block.  I had two wonderful grandmothers.  They were as different as night and day in many aspects, but they both had a fierce love for their families. They also were both single mothers during an era when that wasn't the most socially acceptable idea.  My Grandmother Forbes had five children and her husband left her after he came back from the Korean War.  My Grandmother Moore had three children and we like to say "Grandpa Moore left for a business trip and just never came back."

My Grandmother Moore (Lois Eloise Hawkins Moore) was my father's mother and she lived with us off and on for years until the end of her life.  She was a little lady who was always kind and rarely had a harsh word for anyone.  And could cook.  Good Lord could the woman cook.  She invested that love in me early and I still like to cook, although now-a-days my favorite thing to make for dinner is reservations.  She also was an accomplished seamstress and supported her family with her talent when Grandpa left.  She made clothing and did alterations, but as far as I can tell, she never made a quilt.

(My Grandmother Moore and her Sisters. Grandma is the third from the left)

Grandma Forbes (Cora Perry Forbes) was my maternal grandmother.  Fiercely independent, she left her hometown of Spray, North Carolina and moved herself and five children to Burlington because the economic opportunities were better there. She put herself through nursing school and became a nurse at Alamance Hospital.  Grandma Forbes could do it all - cooking, woodworking, and sewing.  Her father had been a carpenter and her mother an accomplished quilter.  They both taught my Grandmother their crafts. That's where my quilting DNA comes from. Unfortunately I don't have a picture on my computer of my Grandmother Forbes.  I need to fix this and post one of her.

And now I'm a grandmother to one granddarling, Evangeline, and soon to little Ellie, who is due to debut in May.  I just hope and pray that I'm able to pass along ideas and desires and dreams to them the same way my Grandmothers did to me.


Okay, let's move on from the trip down my Memory Lane and get on with the block.

This block is very similar to block one.

I love the background 1 fabric I picked out because I can choose so many fabrics to go with it.  This is what I decided on for this block.

When you're making a quilt -- especially a sampler-type quilt -- it's important to keep some kind of color consistency through out.  I've decided to keep the same blue background for the blocks that have applique in the center of them.  I also used the gold that I have before but added a new green and a new pink.  The pink may look familiar.  It's the fabric I'm using in my setting triangles for the center Blazing Star.

The danger with a sampler quilt for me is that I love color.  Lots of color.  With a sampler quilt, I have the tendency to use lots and lots of different accent fabrics. Sometimes this can work if you have one background fabric, or all your background colors tend to be on the lighter shades of neutrals.  In At Piece with Time, you have four background fabrics and none of my background fabrics are neutral, and only one is solid.  So I have to be careful with my accent fabrics.  I don't want to overwhelm the quilt.

There are 32 triangles in this block.  That means there are 32 exposed bias edges.  Please starch accordingly and be careful when you handle them so they're not stretched.


Step three is very much like step five in block one.  Just watch how it's sewn together.


From this point on, I treated step four like a flying geese (goose?) block.  There are no pressing directions listed with this step, but I pressed towards the background triangles.


And watch for that "Magic X" when putting this block together so that no points are nipped off.


As you're assembling the rows, be sure everything matches up and your triangles are pointing the right way.  I always pin the heck out of my rows to keep them from shifting.  Press it well (and you may find a harder ironing surface works better than a well-padded one) and get ready for the applique.


Tuesday, February 11, 2014

Lookie What I Bought...

The hubs and I had to head towards the coast this past weekend for some business issues.  Honest.  It was business...but I found some cute things I had to share.  I finally, after looking and looking and looking, found this :


My friend Susan had one of these and I've wanted one since I saw hers.  A sippy cup for adult beverages.  Awesome!  Now I need to find one for Meagan.

And then I found this!  It will look wonderful in my new quilt studio!


So excited I had to share!

Block three of At Piece with Time is almost ready for posting.  And so is the machine applique blog.  That one's getting longer and longer.  I will probably need to think about whittling that one into two posts.

Love and Stitches,

Sherri

Wednesday, February 5, 2014

Round Robin

I belong to a wonderful guild -- The High Point Quilt Guild.  It's a fairly new guild and is so full of energy and creativity.  Linda Hudgins is Chairwoman of the Round Robin in our guild.  The members that want to make a square between 16 and 24 inches and then it's passed around the group and each member puts a border on it.  If there are a lot of people who want to do the Round Robin, Linda breaks us into groups of four or five.  The first borders are narrower -- between two and three inches and then it goes to five and six inches.  When you get your square back, you have an over-sized lap quilt or larger.

I love doing Round Robins.  There are no "patterns" for it.  You have to look at the square; look at what's been done by previous members of your group and interpret what you need to do next.  Sometimes it's an easy choice, other times it really, really stretches your creativity.

That's what happened to me this month.  Normally within a day or two after getting the block, I have decided what to do next.  But this time...this time the pressure was on.  This is what I received at our January meeting....


A couple of intimidating factors here.  First, the lady who belongs to this quilt is the First Vice President of our Guild.  The pressure for me is that I'm the President.  She's going to be the next President.  I want her to be somewhat impressed with my quilting!  Plus, she's just a dear lady and I want to do her quilt justice.

Second, is that it's all pieced.  No applique at all.  So my piecing is going to have to shine, shine, shine because there's no pretty applique to hide behind.

But the biggest intimidating factor for me was the fabric.  It's Civil War reproduction fabric.  And while I like that fabric, it's not the part of the fabric store I gravitate to.  I like the pretty bright colors and batiks.  To me the Revolutionary War and Civil War reproduction fabrics are just a little too much on the dark side (no Star Wars pun intended).

And while Angie had included a lot of fabric in her box for us to work with, I was the last one to get the box.  This meant the fabric had been used -- a lot.  I didn't have any fabric, except some light blue, to make a complete solid border around the quilt.  I've always thought of borders like frames and the last one needs to be darker than the rest.

What to do, what to do?

I decided to keep with the cornerstone idea.  And the cornerstones I decided to use was Jacob's Trouble (also known as Jacob's Ladder).  The quilt already had lots of half-square triangles and four-patch squares and that square would tie both of them together.  There was enough of a burgundy and blue print to do part of the borders, but they could only be five-inches wide.  So I added a strip of burgundy to the outer edge of the border and threw in another half-square four-patch to keep tying everything together.

This. Took Me. Forever.

But I'm pleased with the results:
I hope Angie is too.

If you have the opportunity, try a Round Robin at least once.  It will really stretch your creativity and they're so much fun!

Love and Stitches....

Sherri