Thursday, July 28, 2016

Quilting with Your Checkbook

Let’s talk about that last line of directions on just about any quilting pattern:  Quilt as desired…

To me this is the most ambiguous statement out there in the quilting world, because I have no idea what I desire most of the time as far as the quilting process goes.  There are those rare, few times, when I just know what I want the finished process to look like.  However, most of the time I spend hours on line thank God for Pinterest looking at different quilting motifs  before I make up my mind.

There are the times – the quilt is larger than a twin or a quilt is show-bound – when the quilt is destined for the long arm artist.  And that’s what I want to talk about today – how to get your quilt top ready for the long-arm quilter.

The long arm quilting machine is a sewing machine with a frame that ranges from 10 to 14 feet in length with an industrial machine head with a larger harp than any domestic sewing machine.  A complete long arming system typically consists of the machine head, frame, a table with a layer of plastic under which can be placed a pantograph and several rollers on which the fabric layers and batting are attached (Wikipedia). Long arms are not new to quilting world –they’ve been around since the mid-1800’s when they were turned by a crank. Over the past 10-15 years, they’ve found a place in quilt shops and homes.  Cost continues to fall on these wonderful machines, and I am sure that in the future, more of us will have one mine is coming this Christmas.


The first thing a quilter needs to do when considering long arming for her quilt, is talk to other quilters about who they would recommend as a long arm artist.  Long arm artists advertise in a lot of different venues, but I wouldn’t let one load up my quilt until I have had several of my friends recommend one.  Believe me, if a long armer isn’t worth his or her salt, quilters will let you know.

Once you’ve settled on one, call them and set up an appointment to talk about your quilt and what you want.  If the long arm artist has a waiting list, that’s a good sign.  That means he or she is talented at what they do.  The long arm quilter will ask you lots of questions:  Do you want edge-to-edge quilting (an all over quilting design done either free hand or with a pantograph or by computer) or do you want custom quilting (work done with rulers and free hand that makes each block a little different)?  What color of thread do you want on the front and back?  When do you want it completed?  If you want edge-to-edge quilting, they will ask what kind of design did you have in mind and if you want custom quilting be prepared to spend more time working with your quilter.

It’s a wonderful idea to come to this meeting with some definite designs in mind.  If you’re a little fuzzy about what you want as far as an edge-to-edge, look at the pattern and see what the designer used, or do like I do and spend some time browsing the internet.  If you want custom, arrive with sketches so that the long arm quilter has a starting point.  But always listen to your long arm artist.  They’ve got lots of experience and have done lots of quilts.  They may have a computerized design that fits perfectly or a pantograph that works better than what you have in mind.  If you do decide to have custom quilting done, be prepared to pay more per square inch than you will for an all-over design.

The long arm artist will also ask you what kind of batting you want.  If the quilt is not a show quilt, I normally defer to the preference of the long armer.  But if it’s a show quilt with applique, I use two layers – a cotton batt next to the backing and a wool batt next to the top.  The wool batting gives the applique a little extra “umph” and makes it look almost trapuntoed. 

It’s a good idea to keep in mind that a really good long arm artist is going to have several quilts ahead of yours.  Keep this in mind if you’re working on quilts for Christmas, birthdays, graduations, etc.  You will want to make sure you give the long armer enough time to quilt your quilt.

Before you take your quilt to your long arm artist, there are several items that you’re responsible for:

1.     Make sure your quilt is squared up.  We talked about this in an earlier blog but it’s really important.  Measure your quilt top (before borders are added) in three different places along the width and length.  The measurements should come out pretty close – exact is even better.  Take the average of these lengths and widths, and cut the borders.  Apply the borders evenly.  Fullness or puckers in the border can’t be quilted out.  The flatter your quilt top lays, the better your finished quilt will look.

2.    If the border is pieced, stitch 1/8-inch away from the edge.  This will help keep the pieces together and will be covered by the binding.

3.    Make sure all seams are secure and threads are clipped.  Dangling threads can show through the lighter fabrics.

4.    Press seam allowances in such a manner as to reduce bulk.  We covered this in last week’s blog.

5.    Put a safety pin at the top of your quilt.  Remember, your long arm artist is not a mind reader.  What you consider the top and what she considers the top may be two different things.  The safety pin lets her know which end is up!

6.    Don’t worry about basting your quilt or layering it.  They are loaded up on the long arm as separate layers.

7.    Press the top well and fold it accordion-style over a padded hanger to keep the wrinkles at bay.  
     
     As you’re reading this I hope you can relate to what we talked about in last week’s blog.  A great deal of the prep for the quilting (clipping threads, reducing bulk in seams) can be done as you make the top.

The back of the quilt will also need some preparation before you take it to your quilter.  If you’re like me and buy the fabric specifically made for backing (extra wide so you don’t have to piece the back), press it, accordion fold it, and hang it over another hanger.  

If you piece your back, be sure to:

1.     Cut off any selvage edges before stitching the seams and use at least a ½-inch seam allowance.  Leave the selvage edges on the outside edges of the backing.

2.    Trim the top and bottom edges of the backing so that the backing is also squared up.  This will ensure that the quilt loads into the machine straight, and that is important for keeping the design square on your top.

3.    Press the backing.

4.    Mark the top of the backing with a safety pin, just like you did the quilt top.

With a pieced backing or a non-pieced backing, be sure that the back is at least 4-6 inches wider on each side and top and bottom than the quilt top.

These are extra steps, but they are so important if you’re to have a positive experience with the long arm artist and they have a positive experience with you.  Just remember what I said earlier:  Long arm artists are not mind readers.  You have to be sure to communicate clearly with each other.  Ask questions.   Expect reasonable and good service, but not miracles.  If your quilt top isn’t all it needs to be, all the quilting in the world isn’t going to make it perfect.

There will not be a blog next week, as I am leaving with my family on Saturday for our annual Entire Fields Family Vacation also known as Can Seven Adults and Two Kids Under Five Live in One House for a Week.  Seriously.  This should be a reality show….


Love and Stitches…


Sherri and Sam

(PS Sam will not be going to the beach with us.  He, as a rule, hates to travel, even though he has a really blinged and bedazzled cat carrier with all the creature comforts he could ever think of.  Instead, he will have the house to himself and my niece is coming by to pet him and feed him.  I've hidden the catnip, so he should behave himself).


Friday, July 22, 2016

Almost There....


I blogged some months ago about finishing projects and how to get all your ducks in a row to finish successfully and in a reasonable amount of time.  These “ducks”, as you know, are funny creatures. I’m lucky to get all my “ducks” in the same pond, much less in a nice, neat row.


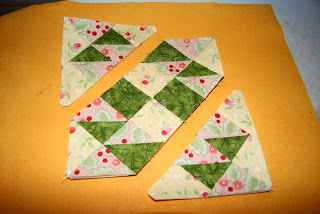
As you’re busy sewing and piecing, it’s important to keep the final steps in mind, even though those steps may seem an eternity away.  At some point, you or someone else is going to have to quilt your top.  So with finishing in our focus, pay attention to the seams.  How you press those seams is just as important as keeping a consistent ¼-inch seam allowance.  Typically, we press towards the darker material so the fabric won’t “shadow” (show through on the front side of the lighter fabric). 
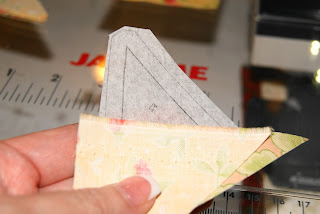


This is a good rule of thumb, but as with many rules, sometimes you have to break them to make progress.


If there are several seams coming together at one point, it may be a good idea to press the seam open.  We do that to reduce bulk.  If there are several seams converging at one point, it can be difficult to get a needle through all of those, plus the backing and batting during the quilting process – even with one of the long arms.  Pressing the seams open will help.  You have to keep the quilting in mind during the piecing so that everything will flow smoothly as you head towards that finish line.


It’s equally important to square up your quilt as you go.  The best quilt patterns will give you an unfinished size of each section and each block as you go.  Remember unfinished is the adjective used for a block or a blocks section before it is set in a quilt.  I love quilt patterns that give you those sizes for each section as you go.  It’s so easy to adjust your seam allowance and make changes before you’ve made a half a dozen blocks and realize the size is not right.  That makes me want to cry and toss the quilt in a closet and just forget I ever started.  However if the pattern doesn’t give you the unfinished size of each section, it should give you the unfinished size of the block.  It’s a good idea to complete one block of each of the types of blocks used in the pattern and make sure the sizes are coming out consistent with the pattern.  It is always, always, always easier to make changes in the beginning than get almost through with the top and realize that blocks are not going to match up.  So finish a sample block, measure it, and square it up if necessary, before making all the blocks.


Squaring up the blocks simply means trimming the block down to the unfinished size required by the pattern.  Often times, you’ll only need to even up the sides before sewing on the sashing or sewing the blocks to one another.  


But this step is important because it means all of your rows should come out the same size, which means all of the sashing will go on without a struggle and then the rows will go together perfectly.


Another thing you may want to do as you start cutting out your quilt is go ahead and make the binding and the label – or at least design the label so all you have to do is drop in the finished date when the top is complete.  


So often we get down to the last few steps and realize we have to cut more fabric.  It’s really easy to go ahead and cut the binding while we’re in the cutting zone at the beginning and it’s just as easy to stitch it together and iron it while we’re piecing.  There’s something about having to go back to that cutting table to make the binding that just kind of takes the wind out of progress and makes it easy to set it aside.  But if it’s already cut and sewn and ironed and just lying there waiting to be stitched down that makes you (or at least me) get excited about that last little push down the road to finishing. 


Which brings us to batting and backing.  I am kind of wishy-washy about these two.  If I find the backing for my quilt that I absolutely have to have when I’m purchasing the rest of the fabric, I will go ahead and buy it.   However, I am absolutely in love with the wide backing fabrics.  They do not have to be pieced.  Now, if I find regular-width material that just meshes perfectly with the top, I will purchase enough of that to piece the back.  But as a whole, I will hold off buying the backing until I can find the wider-width fabrics.  That said, it may take me several days to nail down the backing after my top is complete.  Yes, that hinders my progress.  But to me, not having a seam in the back of my fabric is worth it for two reasons.  First, I hate piecing backings.  And second, a whole back is easier to quilt through if I’m quilting on my mid-arm or domestic machine.

Likewise, different battings give different effects on the quilt and I may not decide on a quilting design until after I complete my top.  The effect and design plays into what kind of batting I purchase and if I have one or two layers of batting.  So, again, with this step I may wait until the top is complete and let it speak to me.  If I am using a long-arm artist to quilt my quilt, I will also talk with him or her before I purchase the batting.


Quilting, just like lots of things in life, is all about reminding ourselves of the completed project while we’re in the middle of making it happen.  And it’s easy to forget that as we’re caught up in making fabric choices and dealing with tricky patterns. The more you piece and quilt, the easier it is to keep all these options in mind in the process.

Love and Stitches,


Sherri and Sam


Thursday, July 14, 2016

It's in the Papers

I’m working on two quilts that are made up of tiny blocks.  The first, Dear Jane, has been a two-year journey, and the second, The Farmer’s Wife, is a fairly recent undertaking.

Wonderful quilts.

Tiny, tiny blocks.

The Farmer’s Wife blocks are 6 ½-inches unfinished and Dear Jane’s blocks are 4 ½-inches unfinished.  I’ve learned a great deal from both, but the primary lesson that I’ve come away with is this: Paper piecing is a great tool to have in your quilting tool box. The smaller the block, the better it is to paper piece it – or at least so in my opinion.  Same thing if there are a lot of pieces in the block – it’s just easier to paper piece it.  Some quilt patterns have paper piecing instructions, some are partially paper pieced and the remainder of the pattern is traditionally pieced.  Some quilts, such as Dear Jane and the Farmer’s Wife, give you a choice. 

Paper piecing (also called foundation piecing) is defined as a technique that involves sewing pieces of fabric to a paper foundation following a numerical sequence.  Seam lines are traced on the foundation.  The pieces of fabric are sewn onto the back side of this foundation (the unmarked side, which is actually the right side of the block). This sewing technique on a foundation allows one to work with very small and uneven pieces with great accuracy, as all sewing takes place along straight lines. (Angie’s Bits and Pieces)

Because of the accuracy, this is my go-to technique for sharp points (e.g., flying geese, New York Beauty blocks).  


New York Beauty Block

Flying Geese Block

Paper piecing is also a great piecing method to use if you have a block that has lots of bias edges, such as those with several half-square triangles.  And if you have blocks like you do in the Dear Jane Quilt – small, complicated blocks with lots and lots of tiny pieces and seams – paper piecing is a terrific way to feed all those small pieces through your sewing machine and over the feed dogs because there is that smooth layer of foundation that won’t get caught in the feed dogs like the miniature pieces of material and seams will.

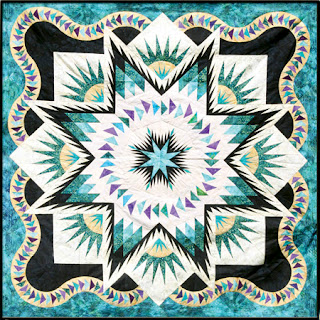
However, to be completely honest, I was never a huge fan of this technique until I attempted a Judy Niemeyer pattern several years ago.  Judy’s patterns are gorgeous and making one of her quilts was definitely on my Quilting Bucket List.  But if this was to be done, I knew that somewhere along the way, I would have to discover my paper-piecing Zen.  And I did.  Somewhere between the 800 flying geese and the New York Beauty squares, me and paper piecing made our peace.  So now if I have lots of pieces, lots of biased edges, or need really sharp points, I pull out the paper piecing technique and have at.


 Judy Niemeyer's Glacier Star

The first decision in this technique is what am I going to use as the foundation?  In other words, what medium is actually going to have the pattern printed on it for you to follow?  I’ve tried lots of different things, but I keep coming back to two.  The first is standard 8 ½ x 11-inch newsprint.  It easily tears away once you’ve completed your block, and it’s thin enough to see through.  Remember, it’s the side of the paper that the pattern is not printed on that’s the right side of the block, but the cutting and sewing lines are on the wrong side.  You still have to see these lines to make sure you position your fabric correctly, and that you have enough to cover the pattern piece.  This newsprint paper is sold in lots of quilt shops under the names of foundation papers or paper piecing paper.  You can save yourself some bucks by going to an office supply store or an office supply on-line site and ordering a ream of newsprint paper.  It’s the same thing, but you’ll have more money left over to buy fabric.  The 500 sheets will last you a long, long time and it’s ink-jet printer friendly.
8 1/2 x 11-inch Newsprint Paper

My very favorite paper piecing foundation is June Tailor’ Perfect Piecing Quilt Block Foundation Sheets.  I really like these for two reasons:  First, they’re sheer.  You can easily see onto the right side of the block pattern from the wrong side.  And second, you don’t have to tear them out of the block before you quilt it.  Traditionally, all papers need to be removed before you quilt the top, because it’s hard to quilt through paper of any kind and when you wash the quilt, the paper will pull away and wad up (think of what a paper towel looks like when you leave it in your pocket and put it through the wash).  However, these foundation papers feel like thin interfacing and don’t necessarily have to be removed prior to quilting.  I do remove the pieces that are in the seams to reduce bulk (I’ll show you this later on in this blog), but the quilter can easily quilt right through the Perfect Piecing Foundation Sheets.  They come in 8 ½ x 11-inch sheets and easily go through the ink jet printers.  Side note here – the ink jet printer capability is important.  More and more patterns are coming out with CDs that have the paper piecing part on them and require you to print those out.  To have something that will feed through your printer saves the step of printing the patterns out on regular paper and then tracing them onto the foundation paper. 

June Tailor's Perfect Piecing Quilt Block Foundation Sheet

Side note number two here – Personally, I do not like regular, standard 8 ½ x 11-inch copy paper for paper piecing for a couple of reasons.  First, sewing through this paper dulls your sewing machine needle quickly.  Secondly, I don’t care how small you make your stitches, this paper is difficult to tear away. It pulls on the fabric and can warp your block. 

The block I’m using for this blog is number 87 in The Farmer’s Wife Quilt.  It’s called Buckwheat and it was a candidate for paper piecing the moment I laid eyes on it.  It has lots of pieces and most of those pieces have points and bias edges.  This is what the pattern looked like when I printed it off on the Perfect Piecing Foundation Sheet. 


And this is what the back looked like.  


Remember, the back side of the paper is the right side of the block, so it’s important that you are able to see all the lines clearly.  The ¼-inch seam allowance is already there, too, so you don’t have to add that when it’s trimmed down.  If several colors of fabric are involved, I have always found it handy to write the color on each of the pattern pieces so I don’t make a mistake in color placement.  


Also notice that the pieces are already numbered.  Most patterns that are paper pieced do this for you.  However, as a quilter gets more experience with this technique, they may opt to change the numerical sequence to fit their style, or can take a block that is not paper pieced and devise their own foundation pieced pattern. 


The next thing I do is measure the pieces in the block and cut out pieces of fabric that are approximately ½-inch larger than the square or rectangle patch.  If it’s an odd shaped patch, or one that is not symmetrical, remember to mirror image the patch, since it will be flipped around on the other side of the paper.  Not all quilters do this – some just cut a piece of fabric they know will cover the patch and keep moving.  I don’t.  I like to be a little more precise with the material I cut.  Paper piecing takes a little more fabric than traditional piecing, so I do try to be as judicious as I can, since I’m trading fabric for precision.  After I’ve made a list of the patches I need, I rotary cut them out and put them next to my sewing machine.


While we’re at the sewing machine, let’s talk feet for paper piecing.  With traditional piecing, most quilters use some type of ¼-inch foot.  

 My Janome 7700 Quarter Inch Foot with the Phalange

In paper piecing, you’re dealing with some issues that your regular piecing may not involve.  It usually involves tinier pieces, more seams, and an added layer (the foundation sheet).  So you may find it easier to us a walking foot (also called a dual feed foot).  This is the one for my Janome 7700.


See the little two-pronged piece behind the foot?  That fits into slots on the bottom of my foot and it literally walks the fabric over the feed dogs, making seams, fabric,  and the foundation piece move as a complete unit, so there isn’t any slippage.  This is what makes points sharp and edges even. 

Janome 7700 Walking Foot with the Dual Feed Engaged

You will also want to shorten the stitch length on your machine.  Most machines come from the factory with a standard stitch length pre-programmed in the machine.  My Janome’s is set at 2.20.  


I lower it to 1.8 when I’m paper piecing.  This shorter length perforates the newsprint or the June Tailor Foundation Sheets more than the standard stitch length and allows either one to be removed easily without tugging on the fabric – which can warp seams.


Now, with the right foot on the machine and the stitch length adjusted, we can start.  So let’s talk glue.  That’s right…glue.  The first piece of fabric will be glued to the paper or foundation sheet, not sewn.  So it’s important to have glue that isn’t permanent and will release smoothly, not stain, and will wash out completely.  The perfect candidate is the pre-school glue sticks you can pick up at almost any dollar store.  It fits all those criteria!


Here’s where you’re going to have to follow me closely (I really need to make a video…).  Remember the wrong side of the paper/foundation sheet is the right side of the block.  Trim a section of the pattern from the foundation sheet, leaving about an 1/8-inch margin of paper around the cutting lines.


 On the wrong side of the paper, on the first patch, apply a dab of glue


Apply the first fabric patch and finger press for a second or two for the glue and fabric to adhere. 


Take it to your cutting area and flip it over so that the paper or foundation sheet is facing you.


Find a post card, index card or one of those pesky cardboard inserts that fall out of magazines and position it on the first cutting line of the foundation sheet.


Fold back the foundation paper so that there is a crease along the cardboard.


You will need to trim the patch, leaving a quarter-inch seam allowance.  I use the add-a quarter ruler for this because it has a grove on it and fits snugly against the cardboard.  Trim along the ruler, to leave a quarter-inch seam allowance.


Now, with the fabric facing you, line up the next patch of material. 


 Flip the patch over so that the foundation sheet is facing you, and sew along the seam that is printed on the paper.


Position your needle to sew several stitches before it begins sewing on the paper, sew straight down the printed line and then stitch a few stitches off the paper.


Take it to ironing board and press the front and back of the section.  It’s important to note that you have to do this to each patch.  Line up, sew, press, and then trim the unit when it’s complete.


When you trim, line up a ruler along the printed cutting edge of the section and use your rotary cutter to trim the excess fabric and paper off.  Once complete, the section is really nicely cut and perfect.


Work on the next set of patches the same way.  I know it’s a lot of sewing, then pressing, and then trimming, but I believe it’s really worth it.  And if you’re using a Fitbit to track your steps, this is a great way to get in a few extra!


Once you’ve completed the next section, you will want to begin to put the sections together to form your patch.  Again, the paper piecing sewing lines and the walking foot on your sewing machine make this a really easy process.  You simply match up the edges and sew along the printed line. 


At this point, I’ve always found it helpful to go ahead and tear out the papers that are in the seams.  This allows for better accuracy when putting all the sections together to form the block.  


Then take it to the ironing board and press the seam open.  This is to reduce bulk.  Most paper pieced blocks have lots of seams and pressing as many of these open reduces the bulk, which makes it easier to quilt.


And there’s your first section, all nicely done.


Repeat the process until all the sections are complete.


Sew the sections together and you’re done!  However, if used paper of any sort in this process instead of the foundation sheets, the paper will have to be removed.


Here are two more blocks that I opted to paper piece this week for my Farmer’s Wife.  The first bock was just a little complicated.


The second block had more bias sides that I wanted to think about!  It was just so much easier to paper piece this block and have the extra stability of the foundation paper to keep the bias from stretching.


If you’ve never tried paper piecing, I would like to encourage you to give it a try on a simple block. Carol Doaks has several easy (and free!) blocks on her website that you could experiment with.  If paper piecing isn’t your favorite technique, let me gently encourage you to at least get better at it.  You never know when it will come in handy, and it’s a great tool to have in your quilting tool box.

Until next week!

Love and Stitches,


Sherri and Sam