
Wednesday, September 28, 2011
West Virginia Memories is Pieced!
Two quilt tops down in less than two weeks! Go me! However, I won't discuss how long it's going to take for me to quilt them....


Wednesday, September 21, 2011
Kinda sorta almost finished....

Sunday, September 4, 2011
Soooo busy....


Beginnings of a crazy quilt....

Reversible quilted placemats

Water lily pincushion

Fabric Basket

Twisted Christmas Wreath
And the rest of the pictures are the squares from Ellen's Hop-to-It Quilt


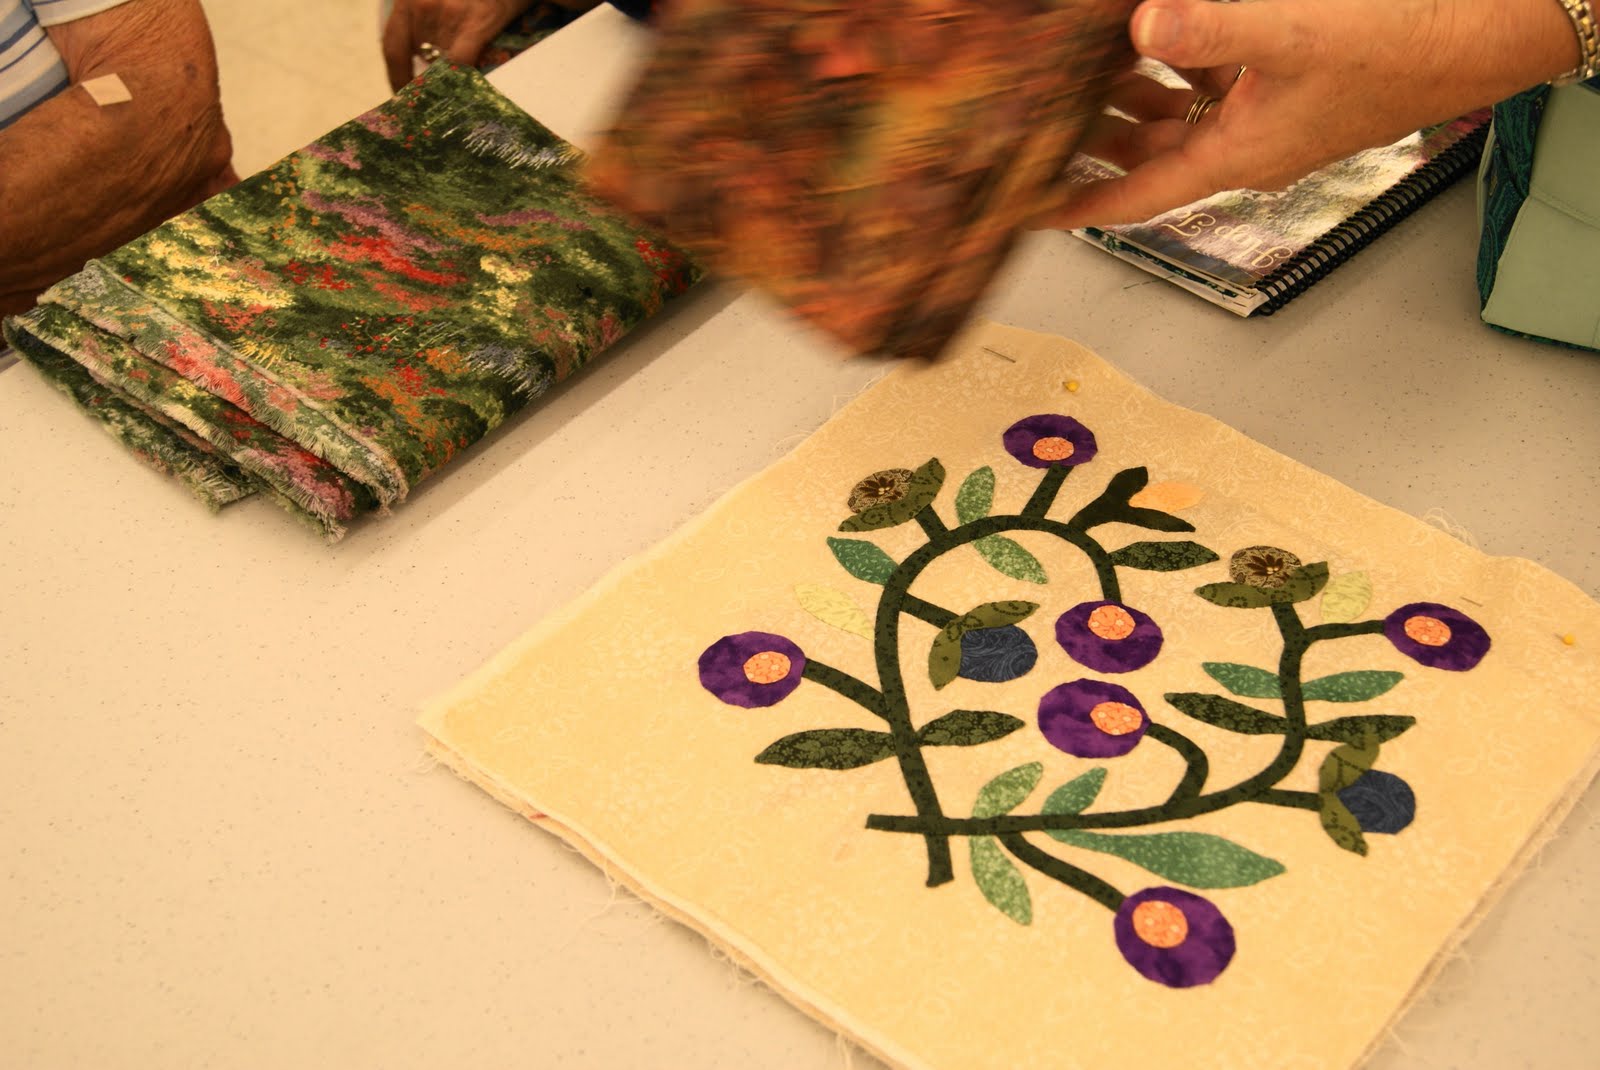
When I finally retire, I hope I can be as productive as Ellen is!
Friday, August 12, 2011
Where Have I Been?
On vacation...the whole month of July and am still "vacating" even as I write. I decided to take the month of July off to try to get some projects finished and get ahead in the classes I teach. I was asked to teach another beginners quilt class starting this fall, so I also had to deal with possible new lesson plans to a whole different group of quilters. There is still some discussion on whether or not this group will actually be beginners or intermediate/advanced beginners. So there was much rifling through patterns and thinking and planning.
My son finished college at the end July and wanted to take one more family vacation before he started work, so that is why I'm still "vacating" in Atlantic Beach, NC. The month off has been nice, but I'm ready to get back to my schedule, my quilts, and my quilting friends.
Of course, while traveling, I've hit quilt shops and talked to quilters. It was while I was at one of these quilt shops a woman asked what I considered my "I-gotta-have-these-with-me-at-all-times" tools. There are several I keep in a Vera Bradley pouch.
 Inside, I keep all these...
 These are tools I simply can't live without....
 The first are marking tools that can be picked up just about anywhere...a fine-tipped marker for marking templates, a #2 mechanical pencil, an eraser stick, and another pencil, just in case the other pencil runs out of lead. The pencils are great for use on the wrong side of the material or for making notes.
 These are for marking the right side of the fabric -- in other words, they wash out quickly and easily. One of the Fons and Porter mechanical pencils holds white lead for dark fabrics and the other holds dark lead for light fabrics. There is also a chalk marker with additional white chalk and colored chalk and a sharpener. The black sponge can be easily dampened with a drop or two of water to remove the chalk marks if I make a mistake and the F & P pencils come with their own erasers and extra lead.
 I also keep an Add A Quarter ruler -- the small version -- the large version stays in my quilting kit at home. This is the yellow ruler at the top. These are wonderful for paper piecing, English paper piecing or just quick measuring. The next, the blue plastic strip, is a half-square triangle marker. Below is a two-pronged awl, which has saved my fingers many times both sewing and ironing tiny pieces of fabric. And finally a toothpick. I cannot applique without a toothpick. A moistened toothpick is wonderful for turning under fabric when you're doing needle-turn applique -- especially the corners and curves.
 Two pairs of scissors. The ones at the tops are actually called lace scissors and are used in French heirloom sewing. The flattened edge makes these great for cutting the backs off large appliqued pieces. They allow you to get between pieces of fabric without cutting through the front of the applique. The scissors with the green handles are serrated applique scissors. The blades have tiny "teeth" that keeps the fabric from raveling too much. I just bought them and absolutely love them. They are by Karen Kay Blakely and I do not leave home without them!
 These don't fit in my tiny pouch, but they stay near it. The thread is specially made applique thread from Superior Thread Company. It's a little pricey, but it lasts a long time. I used to applique with nothing but 100% silk thread, but always had trouble keeping my needle threaded because it was so slippery. This thread is 100% cotton, fine, and the colors blend wonderfully with just about anything.
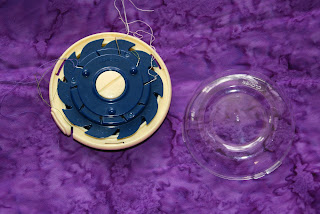 A needle keeper. You can keep your threaded needles in here. This works great when you're appliqueing several colors of cloth and you have to keep several needles threaded. The threads don't tangle. And the best part about the bobbin holder and the keeper?
 They nest!
 And finally, I keep applique pins with me. These are much smaller than the standard pins most of us keep on hand, even smaller than the dressmaker pins. Some quilt stores sell these, but if you can't find them there, go to just about any craft store and look for sequin pins, which are usually located in the make-it-yourself Christmas ornament section. They're the same thing.
My son finished college at the end July and wanted to take one more family vacation before he started work, so that is why I'm still "vacating" in Atlantic Beach, NC. The month off has been nice, but I'm ready to get back to my schedule, my quilts, and my quilting friends.
Of course, while traveling, I've hit quilt shops and talked to quilters. It was while I was at one of these quilt shops a woman asked what I considered my "I-gotta-have-these-with-me-at-all-times" tools. There are several I keep in a Vera Bradley pouch.


Wednesday, July 27, 2011
Dear Jane
Open to question to anyone out there who will answer...
Has anyone worked on a Dear Jane Quilt?
Several women in one of the bees I attend have started a Dear Jane quilt and they would like me to join them. I understand the blocks are tiny...I understand the book has no instructions...
I'm already teaching two classes and leading the Quilting Cuties bee at Hancocks. I'm just wondering how much frustration (if any) is involved in the Dear Jane process. I'd love opinions and answers....
Thanks!
Has anyone worked on a Dear Jane Quilt?
Several women in one of the bees I attend have started a Dear Jane quilt and they would like me to join them. I understand the blocks are tiny...I understand the book has no instructions...
I'm already teaching two classes and leading the Quilting Cuties bee at Hancocks. I'm just wondering how much frustration (if any) is involved in the Dear Jane process. I'd love opinions and answers....
Thanks!
Thursday, June 30, 2011
Southern Album Quilt -- Progress!
I've finished hand quilting the first section of my Southern Album Quilt....
![]()
![]()
![]()
![]()
![]()
![]()
![]()


Sunday, June 26, 2011
It's the Color of Money...or the Color Purple... or the Color of the Rainbow...
I love color. And I've found through my post-graduate studies in education, that I'm a visual learner (like most people) and this makes me even more sensitive to color. There are colors that make me instantly happy, and there are colors that depress me profoundly. For instance, the first thing you will notice when you walk in my house, is that my living room is painted yellow. I like yellow. It makes me happy. As a blond with blue eyes, I can't wear yellow very well (it makes me look sallow), but it's my "happy color." I can be in horrendous mood when I come in from work, but those yellow walls? They make me smile.
I found this out the hard way. For years my living room was a very stiff and formal affair, with hard Burgundies and deep greens, thick carpets, and dark, formal furniture. Bill thoughtfully suggested one day that we refurbish the room, complete with new furniture. He'd take care of the whole thing, the only stipulation he put in front of me was that I had to trust him with everything...from the colors on the wall to the flooring beneath my feet.
I'm a control freak. This was hard.
But I am so glad I let him. He asked me what flower always made me smile and without hesitation, I said "Daffodils." I've always loved them -- ever since I was a small girl. They signaled spring and warmer weather and Easter. Plus, they always looked happy. I came home from work and he had painted the walls the softest daffodil yellow. And to this day, those walls still make me smile and get rid of the worst post-work mood I can possibly have.
So I tell quilters to always put a "happy color" in their quilt. One that will always make them smile...and one they'll always have good memories about when they look at their quilt.
Color and quilts can be intimidating. When I first began quilting, I was petrified to try to chose any of my own colors. My quilts looked as close as they could to the picture on the cover of the pattern. I was even happier if I could order a quilt kit -- that took all the guess work out of picking any colors. Now, after about 15 years later, I'm over that hurdle. If anything I have to reign in my color choices.
And I could write a whole book on color and the color wheel and how to balance your lights and darks and hues. But that is a book and this is a blog. Maybe one day a book will come out of this blog and if it does, I will tackle the color issue and spend pages discussing it. However at this time let me just illustrated this. Below are three blocks:


 These blocks aren't perfect...they are working models for a project I'm designing. However, my point is they are the same block pattern. Notice how the color choices makes them look different. The first block appears to have some parts of it that "float" since the background and some of the triangles are the same color. The second block is a bit richer, but parts of it are tone-on-tone and white has to be added to the block somewhere to add sparkle and definition. The third block looks much more traditional and scrappy.
My point? Don't be intimidated by color. It's a tool in your toolbox as a quilter. A very important one, too. It adds character and definition and breathes life into your work. Color is not defined by a set number. I've seen some beautiful two-color quilts. I've also seen quilts that seem to have all the colors of the rainbow in them and are a riot of tones and hues, and are also just as beautiful. My advice to you? Begin with four or five colors. Make sure one is a focal fabric -- one with lots of color. Let the other colors you select harmonize with the focal fabric. Make sure one of the fabrics is one you can't live without. Play with them. Mix and match. Switch them around.
Have. Fun.
The color police aren't going to slap the cuffs on you and haul you to quilt jail. Remember there are very few mistakes that can't be fixed and very few mistakes you won't learn from.Above all, don't be afraid of color. Dive right in. Remember how excited you used to get over that huge box of Crayolas? Think of your fabric as your grown-box of crayons. Enjoy!
I found this out the hard way. For years my living room was a very stiff and formal affair, with hard Burgundies and deep greens, thick carpets, and dark, formal furniture. Bill thoughtfully suggested one day that we refurbish the room, complete with new furniture. He'd take care of the whole thing, the only stipulation he put in front of me was that I had to trust him with everything...from the colors on the wall to the flooring beneath my feet.
I'm a control freak. This was hard.
But I am so glad I let him. He asked me what flower always made me smile and without hesitation, I said "Daffodils." I've always loved them -- ever since I was a small girl. They signaled spring and warmer weather and Easter. Plus, they always looked happy. I came home from work and he had painted the walls the softest daffodil yellow. And to this day, those walls still make me smile and get rid of the worst post-work mood I can possibly have.
So I tell quilters to always put a "happy color" in their quilt. One that will always make them smile...and one they'll always have good memories about when they look at their quilt.
Color and quilts can be intimidating. When I first began quilting, I was petrified to try to chose any of my own colors. My quilts looked as close as they could to the picture on the cover of the pattern. I was even happier if I could order a quilt kit -- that took all the guess work out of picking any colors. Now, after about 15 years later, I'm over that hurdle. If anything I have to reign in my color choices.
And I could write a whole book on color and the color wheel and how to balance your lights and darks and hues. But that is a book and this is a blog. Maybe one day a book will come out of this blog and if it does, I will tackle the color issue and spend pages discussing it. However at this time let me just illustrated this. Below are three blocks:


My point? Don't be intimidated by color. It's a tool in your toolbox as a quilter. A very important one, too. It adds character and definition and breathes life into your work. Color is not defined by a set number. I've seen some beautiful two-color quilts. I've also seen quilts that seem to have all the colors of the rainbow in them and are a riot of tones and hues, and are also just as beautiful. My advice to you? Begin with four or five colors. Make sure one is a focal fabric -- one with lots of color. Let the other colors you select harmonize with the focal fabric. Make sure one of the fabrics is one you can't live without. Play with them. Mix and match. Switch them around.
Have. Fun.
The color police aren't going to slap the cuffs on you and haul you to quilt jail. Remember there are very few mistakes that can't be fixed and very few mistakes you won't learn from.Above all, don't be afraid of color. Dive right in. Remember how excited you used to get over that huge box of Crayolas? Think of your fabric as your grown-box of crayons. Enjoy!
Subscribe to:
Posts (Atom)